After an extended hiatus due to family vacations and my own continuing professional development, Nature Club was back in business. I committed to working through the Feathered Friends materials from the Cornell Lab of Ornithology. I started the program late, though - it is a program with activities for September to May, but we didn't really get into it until we started up in January. Aside from the activity about migration, which is listed as an October activity that I will postpone until April, the topics haven't been too dependent on the seasons.
Our focus at this meeting was moving like a bird. We watched a few select videos of birds that have developed distinct ways of moving (this link has a select video for each bird that highlights its specific adaptations, while this one gives you a whole library to look and listen through). Each Nature Clubber got to act out one of the birds we watched, and then we talked about how the bird was built for its movement. For example - the ostrich is built to walk or run because its size prohibits it from flying. Loons are at home in the water, partly because their feet are built to make them excellent swimmers.
We took our bird movements one step further by heading outside to play "Birdy Says", inspired by Simon Says. We worked out a few bird movements for other birds - hummingbirds, vultures and penguins, then had fun flitting and jumping and waddling around in the snow.
Showing posts with label hands. Show all posts
Showing posts with label hands. Show all posts
Tuesday, 4 March 2014

Thursday, 5 December 2013
From Hectic to Harmonious...Day 3. And Nature Club too.
Today Mama was on a mission. I'm in a bit of a race against the clock and when the clock strikes zero, gifts for out-of-town relatives need to be in the mail. Today's project to start and finish was dying play silks. We worked on yellow ones dyed with turmeric yesterday and they look fabulous - bright and bold. Today I tried using Kool-Aid mix as the dye and the colours are soft and gentle. We came home from supper tonight and were greeted by the strange scent of Kool-Aid infused vinegar. I must admit, I'm feeling a little nauseous. There are great instructions for dying play silks with Koo-Aid here.
Indeed, the pulse in our household had a "mission" vibe to it. In a good way. In a working with purpose kind of way. There were homemade snacks to make for the birds. There was an art class to be had at my kitchen table (our instructor today was Jaelyn, who tried out what I imagine wet-on-wet watercolour painting is. Self-taught, that one). There were books to be read and letters to write to Santa. There were freezer-paper stenciled shirts to be painted too.
Somewhat ironically, today's From Hectic to Harmonious challenge was to remove three things from my to-do list. Note that says remove things, not do them and scratch them off. It's about prioritizing and letting go of the stuff that doesn't matter.
Today's challenge is tough for me. I think I've already made great strides to make this year's holiday a little simpler than last year's. The number of handmades is down, and what I have made was simpler to make in the first place. There won't be a lot of Christmas baking going on here, and the holiday countdown garland hanging in our living room feels more like a way to be intentional about the activities we want to share with our children and prioritizing time to do them. So while the garland is new, the activities in it would happen anyway with or without the garland to guide us as to when they happen.
So, after much pondering, scratching my head and furrowing my brow, here is what I've come up with:
~ I will turn off Facebook until December 28
~ I will keep the computer games turned off too, until December 28
~ I will only have one errand morning or afternoon a week. All of us will need to be super-resourceful if there is some "gotta have" thing. If something is needed right now, it will need to be found within the four walls of this house. While I would love for this to apply to everything, I will be practical and reasonable...if we need milk because for some mysterious reason there is none left in the fridge, we'll go get milk. But I'm not running out at 10:00 pm to get something like, say, glitter.
~ I will, without guilt, buy premade stuff if I need to. The holidays will still be wonderful if we buy premade pie crusts instead of the ones from scratch. Or if the whole pie is premade.
And I'm pleased to report I've already had success in purging things from my to-do list. I was planning to make snow crystals inside today with Nature Club. This would have required me to pick up dry ice and Styrofoam containers, as well as get the experiment set up and, optimally, test it out. But with most of our evenings full of other goodness, which I wouldn't trade for a second, I pulled the plug on making snow crystals. Instead, we read the book, The Story of Snow and made snowflake cutouts from last year's left over printouts.
I knew there would be little nuggets of success scattered throughout this holiday challenge!
Indeed, the pulse in our household had a "mission" vibe to it. In a good way. In a working with purpose kind of way. There were homemade snacks to make for the birds. There was an art class to be had at my kitchen table (our instructor today was Jaelyn, who tried out what I imagine wet-on-wet watercolour painting is. Self-taught, that one). There were books to be read and letters to write to Santa. There were freezer-paper stenciled shirts to be painted too.
Somewhat ironically, today's From Hectic to Harmonious challenge was to remove three things from my to-do list. Note that says remove things, not do them and scratch them off. It's about prioritizing and letting go of the stuff that doesn't matter.
Today's challenge is tough for me. I think I've already made great strides to make this year's holiday a little simpler than last year's. The number of handmades is down, and what I have made was simpler to make in the first place. There won't be a lot of Christmas baking going on here, and the holiday countdown garland hanging in our living room feels more like a way to be intentional about the activities we want to share with our children and prioritizing time to do them. So while the garland is new, the activities in it would happen anyway with or without the garland to guide us as to when they happen.
So, after much pondering, scratching my head and furrowing my brow, here is what I've come up with:
~ I will turn off Facebook until December 28
~ I will keep the computer games turned off too, until December 28
~ I will only have one errand morning or afternoon a week. All of us will need to be super-resourceful if there is some "gotta have" thing. If something is needed right now, it will need to be found within the four walls of this house. While I would love for this to apply to everything, I will be practical and reasonable...if we need milk because for some mysterious reason there is none left in the fridge, we'll go get milk. But I'm not running out at 10:00 pm to get something like, say, glitter.
~ I will, without guilt, buy premade stuff if I need to. The holidays will still be wonderful if we buy premade pie crusts instead of the ones from scratch. Or if the whole pie is premade.
And I'm pleased to report I've already had success in purging things from my to-do list. I was planning to make snow crystals inside today with Nature Club. This would have required me to pick up dry ice and Styrofoam containers, as well as get the experiment set up and, optimally, test it out. But with most of our evenings full of other goodness, which I wouldn't trade for a second, I pulled the plug on making snow crystals. Instead, we read the book, The Story of Snow and made snowflake cutouts from last year's left over printouts.
I knew there would be little nuggets of success scattered throughout this holiday challenge!
Tuesday, 15 October 2013
Club Day. The Birds of Prey Version.
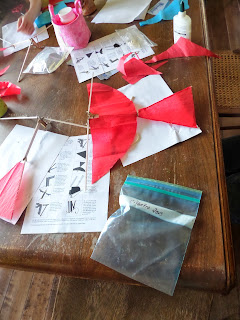
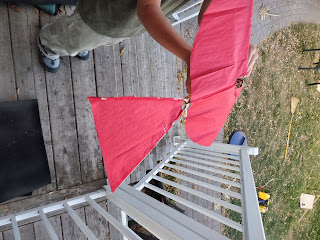
We did it! We finished the ornithopters today! There was lots of slow, patient cutting of tissue paper and concentration as we connected all the pieces together. There was a little of waiting for glue to dry. There was some testing of the ornithopters, and fascination at watching the wings flap on their own (after the elastic that powers the whole thing was wound up, of course). There was a bit of talk of pretending to be wizards, with the birds being a most wizardly accessory. Then, I think, the clubbers decided that perhaps those birds should be handled quite carefully, and they were left to allow the glue to finish drying as the Clubbers burst outside to enjoy free time.




Thursday, 10 October 2013
Club Day. The Nature Version.
There's a lot of inspiration for nature-related projects around this time of year. I have a bit of a line-up of projects that would all be good for right this very moment, but only so much time before the weather becomes uncooperative. Given the blustery days we've had and the abundance of leaves that have fluttered to the ground of late, I decided I couldn't wait another two weeks to make leaf tiles, which were a project featured in the 2013 Fall Living Education Journal from Oak Meadow.
There was so much in this project that was fun. A scavenger hunt for leaves, mushing and manipulating clay, dreaming of what the tiles would look like when they were dry...oh, there was goodness at every turn.
While we didn't need to go far to find just-right leaves - tromping through our front yard was good enough - we still needed to be selective. We were hunting for leaves that were not too big, yet not too small, combined with enough definition that they would leave a print behind when they dried and peeled out of the clay. The leaves still needed to be pliable - the leaves that crackled under our feet were best left for raking into piles for jumping in. Most of the clubbers chose leaves from the raspberry bush, the strawberry patch, the old elms, the baby maples invading my garden boxes, or the high bush cranberry.
Then there was the task of squishing the clay out of its brick shape and into something that could be rolled out with a rolling pin. We used Sargant air hardening clay, which had a better consistency than other air hardening clays we've used in the past. It needed just the slightest bit of water to be malleable enough to roll out.
The project instructions described making a border from wood that was 1/2 inch thick. I opted not to do this, partly because I didn't have any pieces that were that thickness, and partly because I didn't have enough clay for the Clubbers to make large tiles that were half an inch thick! We simply cut away the edges with a butter knife and then proceeded with the rest of the instructions.
I don't know why I thought this project would leave a simple self-contained mess at best, but that was an error of judgment on my part. If I were to do it again, I would do it all outside...that way, I could simply hose off any outdoor furniture that got clay or clay-coloured water on it. And I would have lots of rags handy for spills or clay inadvertently getting here, there, and everywhere. I would also think a little harder about buying the grey air hardening clay instead of the terra cotta that we used...the red clay really wanted to stain everything, although it is such a gorgeous colour. Something to think about for next time!


There was so much in this project that was fun. A scavenger hunt for leaves, mushing and manipulating clay, dreaming of what the tiles would look like when they were dry...oh, there was goodness at every turn.
While we didn't need to go far to find just-right leaves - tromping through our front yard was good enough - we still needed to be selective. We were hunting for leaves that were not too big, yet not too small, combined with enough definition that they would leave a print behind when they dried and peeled out of the clay. The leaves still needed to be pliable - the leaves that crackled under our feet were best left for raking into piles for jumping in. Most of the clubbers chose leaves from the raspberry bush, the strawberry patch, the old elms, the baby maples invading my garden boxes, or the high bush cranberry.
Then there was the task of squishing the clay out of its brick shape and into something that could be rolled out with a rolling pin. We used Sargant air hardening clay, which had a better consistency than other air hardening clays we've used in the past. It needed just the slightest bit of water to be malleable enough to roll out.
The project instructions described making a border from wood that was 1/2 inch thick. I opted not to do this, partly because I didn't have any pieces that were that thickness, and partly because I didn't have enough clay for the Clubbers to make large tiles that were half an inch thick! We simply cut away the edges with a butter knife and then proceeded with the rest of the instructions.
I don't know why I thought this project would leave a simple self-contained mess at best, but that was an error of judgment on my part. If I were to do it again, I would do it all outside...that way, I could simply hose off any outdoor furniture that got clay or clay-coloured water on it. And I would have lots of rags handy for spills or clay inadvertently getting here, there, and everywhere. I would also think a little harder about buying the grey air hardening clay instead of the terra cotta that we used...the red clay really wanted to stain everything, although it is such a gorgeous colour. Something to think about for next time!


I'm looking forward to seeing what lies beneath!
Thursday, 3 October 2013
Together again
Despite a rough start to the morning, we found ourselves at 10:00 with our bookwork for the day all done. I felt myself in a place we hadn't been to before, at least in recent memory - two hours left in the morning and nothing really planned.
Nicholas was already occupied on the computer, finding bird pictures for some scavenger hunt cards he was making for a friend. There's a great way to build spelling skills! But the girls were in need of some time with their Mama. And there was that Michaelmas celebration that I had wanted to play with...to see where we could take it, but didn't have time to do at the beginning of the week when I had originally planned it. Late is better than never, right?
We are not a religious family. I had never heard of Michaelmas before reading books about Waldorf education. There is no real significance to the celebration for us, and in that I struggle a bit. But new traditions, especially fun ones, need to start somewhere, and I'm game for building our own traditions. I used All Year Round to inspire the projects we did today.
As the girls were playing, I gathered up the ingredients for making a harvest loaf. As the yeast was proofing, I read them the story of Saint George and the Dragon. Then we made our way over to the kitchen and I read the story of Michael and the Dragon while adding ingredients and mixing them together. I'm looking forward to enjoying our harvest loaf as part of our afternoon snack!


1. Gather supplies and prepare the work area:
~ I used an old vinyl tablecloth to catch any spills or splatters, as hot wax can fly off a paintbrush as well as paint can.
~ We further protected our workspace from spills by using parchment paper muffin papers underneath our candles, and to pour any unused melted wax into. These worked great, as the wax, when cool, simply peeled right out of the paper and we could reuse it again in a matter of minutes.
~ We found a synthetic paintbrush that I didn't mind never using again for paint.
~ We used a small gravy ladle to melt the wax in, again, an item that I didn't mind if we ever used it again. Beeswax is one of those things that I really don't like cleaning up after!
~ A candle and matches, for melting the beeswax
~ Candles for painting on. I found some at a thrift store that were about 2 inches in diameter, and these were perfect.
~ Your beeswax. As I mentioned, we used leftover beeswax from candles. You could also use small or broken beeswax crayons too. I wouldn't recommend using a crayon made of a synthetic wax...I don't imagine it would smell too pretty.
2. Melt the beeswax:
~ This was my job. It's simply a matter of placing a small chunk of beeswax into the spoon and holding it over a lit candle.
~ Be careful not to get too close to the flame - beeswax will start to burn at a relatively low temperature. I gently swirled the beeswax in the spoon to help it melt faster.
~ Oh, and be aware that the bottom of your spoon will likely turn black.
~ Once the wax is melted, it can be removed from the flame and your little one can dip his or her brush right into the spoon. If it starts clumping, simply hold it back over the flame.

3. Let the painting begin!
~ Painting with beeswax was a lot like painting with paint...dip the brush and paint on the surface of the candle.
~ The wax will harden quickly, so use lots of short strokes, which was my children's preferred method. I dotted the wax onto my candle in an attempt to give my dragon a scaled look. It worked great for the red eye, claws, and neck plates.
~ Like painting on a vertical surface, the wax may drip down if too much is put in one spot. Unlike paint though, I imagine that the beeswax could be chipped off after it hardens if it ends up in the wrong place.

4. About changing colours:
~ I poured any leftover beeswax into a muffin paper, then peeled it out once it had cooled and hardened.
~ I was only prepared to part with one spoon, so our colour changes were not absolute or perfect...there was always a little of the last colour getting mixed into the new colour being added. This worked out well, though, because we only had a few colours to work with. Each person had the same but slightly different colours on their candles.
5. Cleanup:
~ It is so much easier to cleanup from painting with beeswax than with paint! Essentially, after the last candle was done, and the remaining wax was poured out and hardened (as in step 4 above), everything we used, from the muffin papers to the paintbrush to the spoon and the leftover wax, was put back into our stash of beeswax stuff. There was nothing to wash or scrub clean, because it was really about as clean as it was going to get.
By the time we got to the end of the day, which was full of singing, tickle kisses, and laughing just for the sake of laughing, I discovered the key for what this celebration will mean to me. I mused to myself that our harvest loaf was the first bread I'd made since the weather started getting warmer in the spring. I feel ourselves moving out of sweltering days and into days where the heat from the stove and oven is a welcome thing. Perhaps the dragon can symbolize our need for fire to warm our toes and noses as the days get chillier. Perhaps the bread can symbolize the change in the rhythm of the seasons. Perhaps the soft glow of the candles can represent moving into quieter, more reflective times.

Nicholas was already occupied on the computer, finding bird pictures for some scavenger hunt cards he was making for a friend. There's a great way to build spelling skills! But the girls were in need of some time with their Mama. And there was that Michaelmas celebration that I had wanted to play with...to see where we could take it, but didn't have time to do at the beginning of the week when I had originally planned it. Late is better than never, right?
We are not a religious family. I had never heard of Michaelmas before reading books about Waldorf education. There is no real significance to the celebration for us, and in that I struggle a bit. But new traditions, especially fun ones, need to start somewhere, and I'm game for building our own traditions. I used All Year Round to inspire the projects we did today.
As the girls were playing, I gathered up the ingredients for making a harvest loaf. As the yeast was proofing, I read them the story of Saint George and the Dragon. Then we made our way over to the kitchen and I read the story of Michael and the Dragon while adding ingredients and mixing them together. I'm looking forward to enjoying our harvest loaf as part of our afternoon snack!


After lunch, while Astrin rested, we decorated candles. The project gave us two options - we could use modelling beeswax and simply roll out shapes and press them by hand into the candles, or we could use melted wax and paint designs on the candles. We used leftover pieces of old beeswax candles as our paint. Here's how we did it:
1. Gather supplies and prepare the work area:
~ I used an old vinyl tablecloth to catch any spills or splatters, as hot wax can fly off a paintbrush as well as paint can.
~ We further protected our workspace from spills by using parchment paper muffin papers underneath our candles, and to pour any unused melted wax into. These worked great, as the wax, when cool, simply peeled right out of the paper and we could reuse it again in a matter of minutes.
~ We found a synthetic paintbrush that I didn't mind never using again for paint.
~ We used a small gravy ladle to melt the wax in, again, an item that I didn't mind if we ever used it again. Beeswax is one of those things that I really don't like cleaning up after!
~ A candle and matches, for melting the beeswax
~ Candles for painting on. I found some at a thrift store that were about 2 inches in diameter, and these were perfect.
~ Your beeswax. As I mentioned, we used leftover beeswax from candles. You could also use small or broken beeswax crayons too. I wouldn't recommend using a crayon made of a synthetic wax...I don't imagine it would smell too pretty.
2. Melt the beeswax:
~ This was my job. It's simply a matter of placing a small chunk of beeswax into the spoon and holding it over a lit candle.
~ Be careful not to get too close to the flame - beeswax will start to burn at a relatively low temperature. I gently swirled the beeswax in the spoon to help it melt faster.
~ Oh, and be aware that the bottom of your spoon will likely turn black.
~ Once the wax is melted, it can be removed from the flame and your little one can dip his or her brush right into the spoon. If it starts clumping, simply hold it back over the flame.

3. Let the painting begin!
~ Painting with beeswax was a lot like painting with paint...dip the brush and paint on the surface of the candle.
~ The wax will harden quickly, so use lots of short strokes, which was my children's preferred method. I dotted the wax onto my candle in an attempt to give my dragon a scaled look. It worked great for the red eye, claws, and neck plates.
~ Like painting on a vertical surface, the wax may drip down if too much is put in one spot. Unlike paint though, I imagine that the beeswax could be chipped off after it hardens if it ends up in the wrong place.

4. About changing colours:
~ I poured any leftover beeswax into a muffin paper, then peeled it out once it had cooled and hardened.
~ I was only prepared to part with one spoon, so our colour changes were not absolute or perfect...there was always a little of the last colour getting mixed into the new colour being added. This worked out well, though, because we only had a few colours to work with. Each person had the same but slightly different colours on their candles.
5. Cleanup:
~ It is so much easier to cleanup from painting with beeswax than with paint! Essentially, after the last candle was done, and the remaining wax was poured out and hardened (as in step 4 above), everything we used, from the muffin papers to the paintbrush to the spoon and the leftover wax, was put back into our stash of beeswax stuff. There was nothing to wash or scrub clean, because it was really about as clean as it was going to get.
By the time we got to the end of the day, which was full of singing, tickle kisses, and laughing just for the sake of laughing, I discovered the key for what this celebration will mean to me. I mused to myself that our harvest loaf was the first bread I'd made since the weather started getting warmer in the spring. I feel ourselves moving out of sweltering days and into days where the heat from the stove and oven is a welcome thing. Perhaps the dragon can symbolize our need for fire to warm our toes and noses as the days get chillier. Perhaps the bread can symbolize the change in the rhythm of the seasons. Perhaps the soft glow of the candles can represent moving into quieter, more reflective times.

Tuesday, 24 September 2013
That toddler of mine!
I remember lamenting about what to do with that busy toddler of mine who wanted to tear the house apart or run around screeching while I was trying to work with my older children. And while I haven't completely solved that problem (yesterday comes to mind), I have tried to put together a few activities for Astrin that are quiet, stimulating, and hands on. Without further ado, let's go on a tour of what Astrin's mornings look like.
Once everyone is ready to face the day - breakfast eaten, teeth brushed, "outside" clothes on in place of pajamas - the three children go for a walk around the block. This gives me time to clean up the kitchen table and prepare for the lessons ahead. I've found mornings tend to go better with a morning walk - everyone has felt the breeze on their face, breathed in fresh air, and said hello to the sun, birds, and insects that they spot and are ready to embrace the morning's learning.
Astrin and I then do what I'm calling circle time. I have no idea what Waldorf purists would think of our circle time, but it works for us. We sing a greeting song, which I recall my grandmother singing to us as we rose in the morning, followed by a few songs about the body and a couple more about numbers. We cuddle up for a story, then Astrin has time on her own while I move my attention to the older children.
Astrin often chooses what she would like to do during her "free" time. Today she chose to read books. The other day she chose to sit at the table and sort the items in our nature basket. I brought out a cupcake pan and she carefully sorted shells, pinecones, rocks, and other items. She has also used the same cupcake pan to sort beads by colour.


I also created a rice bin for Astrin to play with, upon the advice of another homeschooling mama. It's a pretty simple bin, with cups for pouring, spoons for measuring, and sticks for stirring. When I first brought it out to play with, I told her the rice was to stay in the bin - if rice was thrown then the bin would be put away until another day. Some spills are expected, and in that case, she has her broom and dustpan for sweeping up the mess. While she doesn't sweep up every grain that falls, I'm trying to encourage her to clean up after herself. I must admit this activity has required quite the leap of faith on my part, but we have yet to cut time with the rice bin short!

Quite a few years ago, Nicholas was given a hammer-tic set. It consists of corkboard, a small wooden hammer, various wooden shapes with small holes in them and tacks. The wooden shapes are attached to the corkboard with the tacks and hammer. It turns out that Astrin enjoys this toy! I do need to supervise her, though, because of the small pieces.
Other toys that we have available to Astrin include wooden puzzles, Lego, and dinosaurs. She has paper for colouring, cutting and pasting at her disposal, as well as some nature-themed colouring pages I printed off. And did I mention the books of all shapes, sizes, and topics? She is a bookworm in the purest sense of the word, though she has yet to read a word.
I have plans for making additional activities and materials for her in the winter months. Teaching Montessori in the Home: The Pre-school Years is a great resource for age-appropriate activities for younger children. Stay tuned!
What do you do to keep the harmony with your toddler while working with your older children?
Once everyone is ready to face the day - breakfast eaten, teeth brushed, "outside" clothes on in place of pajamas - the three children go for a walk around the block. This gives me time to clean up the kitchen table and prepare for the lessons ahead. I've found mornings tend to go better with a morning walk - everyone has felt the breeze on their face, breathed in fresh air, and said hello to the sun, birds, and insects that they spot and are ready to embrace the morning's learning.
Astrin and I then do what I'm calling circle time. I have no idea what Waldorf purists would think of our circle time, but it works for us. We sing a greeting song, which I recall my grandmother singing to us as we rose in the morning, followed by a few songs about the body and a couple more about numbers. We cuddle up for a story, then Astrin has time on her own while I move my attention to the older children.
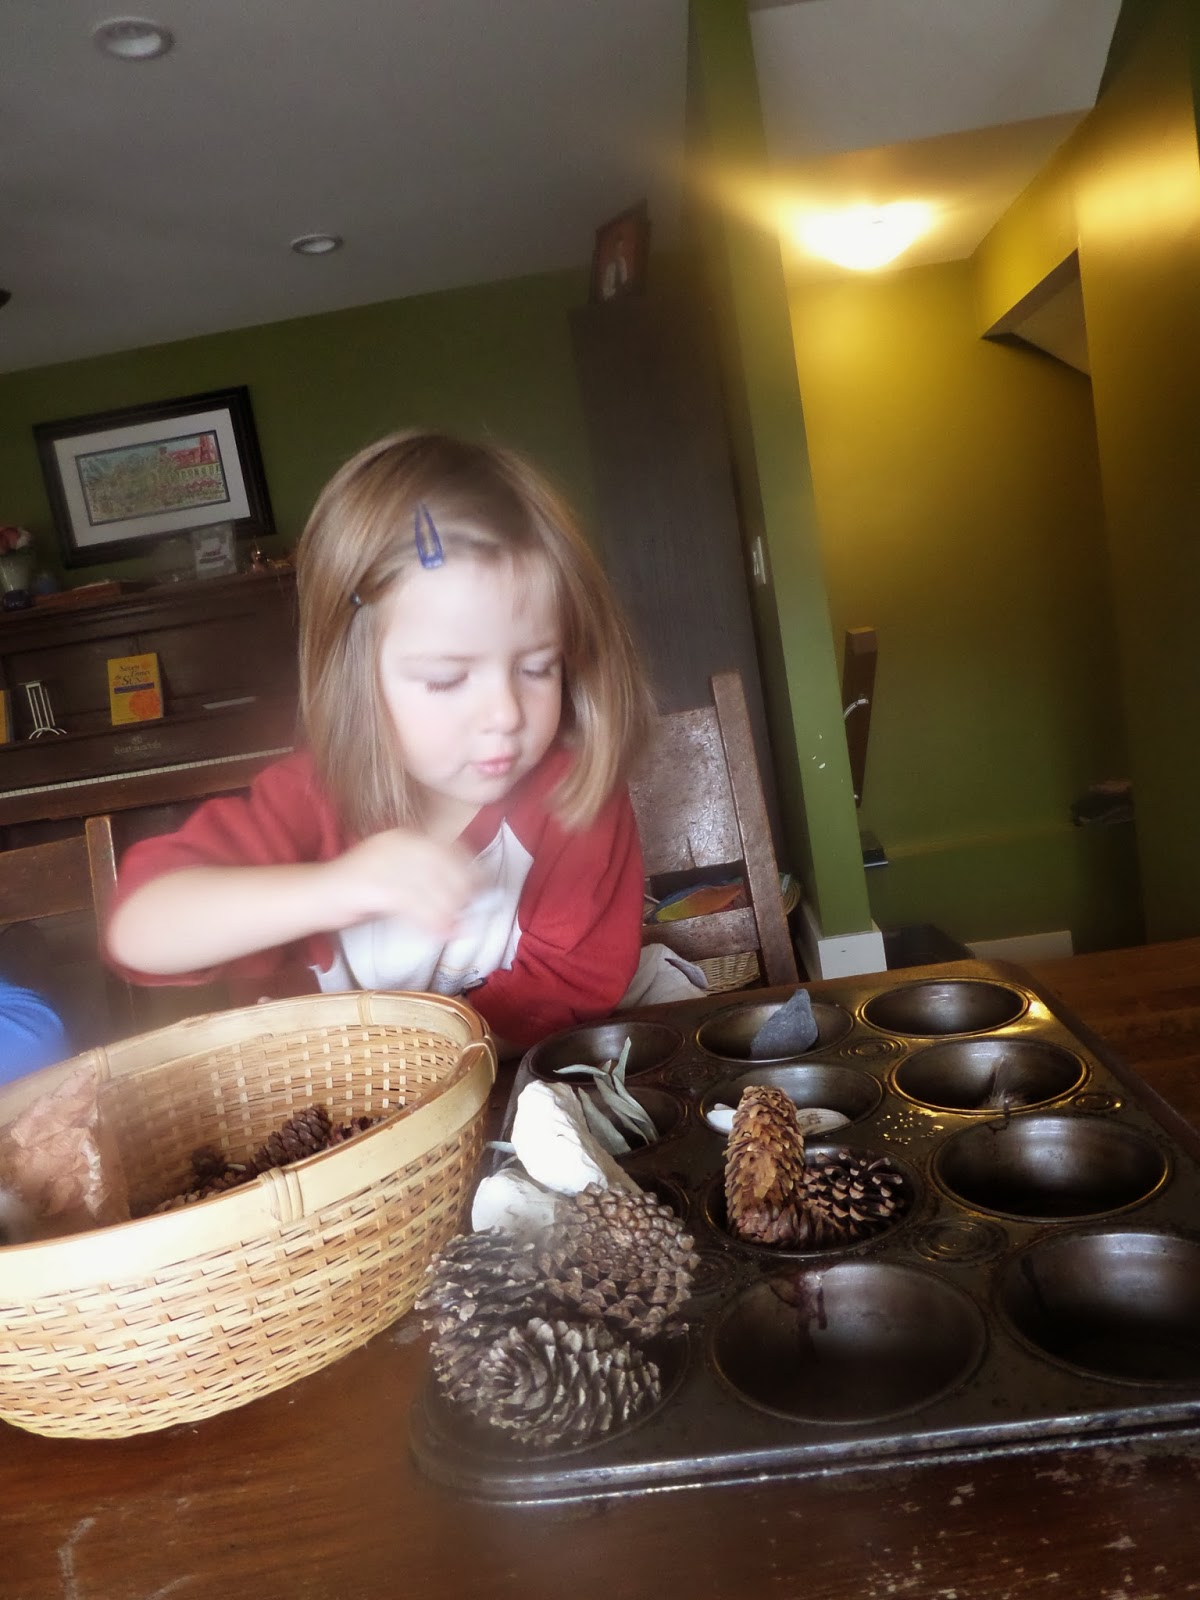
Astrin often chooses what she would like to do during her "free" time. Today she chose to read books. The other day she chose to sit at the table and sort the items in our nature basket. I brought out a cupcake pan and she carefully sorted shells, pinecones, rocks, and other items. She has also used the same cupcake pan to sort beads by colour.

I also created a rice bin for Astrin to play with, upon the advice of another homeschooling mama. It's a pretty simple bin, with cups for pouring, spoons for measuring, and sticks for stirring. When I first brought it out to play with, I told her the rice was to stay in the bin - if rice was thrown then the bin would be put away until another day. Some spills are expected, and in that case, she has her broom and dustpan for sweeping up the mess. While she doesn't sweep up every grain that falls, I'm trying to encourage her to clean up after herself. I must admit this activity has required quite the leap of faith on my part, but we have yet to cut time with the rice bin short!

Quite a few years ago, Nicholas was given a hammer-tic set. It consists of corkboard, a small wooden hammer, various wooden shapes with small holes in them and tacks. The wooden shapes are attached to the corkboard with the tacks and hammer. It turns out that Astrin enjoys this toy! I do need to supervise her, though, because of the small pieces.
Other toys that we have available to Astrin include wooden puzzles, Lego, and dinosaurs. She has paper for colouring, cutting and pasting at her disposal, as well as some nature-themed colouring pages I printed off. And did I mention the books of all shapes, sizes, and topics? She is a bookworm in the purest sense of the word, though she has yet to read a word.
I have plans for making additional activities and materials for her in the winter months. Teaching Montessori in the Home: The Pre-school Years is a great resource for age-appropriate activities for younger children. Stay tuned!
What do you do to keep the harmony with your toddler while working with your older children?
Monday, 16 September 2013
I heart my heart
We're taking our exploration of the human body system by system and up next was the circulatory system. We were fortunate to take our learning outdoors and do a couple really wonderful activities to get the children engaged and interested to learn more.
In researching activities for us to do, I read a comment about science being an incredibly difficult subject for children to learn traditionally because it requires learning both a new vocabulary as well as the actual scientific concepts being introduced. I even watched a Ted Talk about this very same thing a few months ago. Sadly, I also witnessed it first-hand when we went through some of the finer details of the digestive system. I'm finding many library books too detailed for my little ones to discern the main points. I was thankful to find Hear Your Heart, as it introduces the main points in simple terms and straightforward language. We kicked off our circulatory system adventure with this book.
We went on to do several experiments and activities, these coming from How the Body Works. We felt around for our pulses and learned that the feeling is the blood being pushed through our arteries. We made a stethoscope out of plastic tubing and a funnel so that we could hear our heart sounds. Then we discovered that our heart beats faster after exercise...and the more intense the exercise, the harder and faster it beats. We learned this by comparing our resting heart rates to our heart rates after one minute of exercise (jumping jacks) and two minutes of exercise (running around the block). We also learned a bit about blood, including some of the substances in our blood, how a scab is formed, and foods that can help our blood stay healthy.


There are several pretty neat concoctions in Hands-on Grossology - one for fake wounds and the other for making fake blood. I'm reluctant because of the mess they will make, but I know the kids would get a kick out of it and would likely make them again as they continue their battle scenes. We'll see if my reluctance lifts as the week progresses.
In researching activities for us to do, I read a comment about science being an incredibly difficult subject for children to learn traditionally because it requires learning both a new vocabulary as well as the actual scientific concepts being introduced. I even watched a Ted Talk about this very same thing a few months ago. Sadly, I also witnessed it first-hand when we went through some of the finer details of the digestive system. I'm finding many library books too detailed for my little ones to discern the main points. I was thankful to find Hear Your Heart, as it introduces the main points in simple terms and straightforward language. We kicked off our circulatory system adventure with this book.
We went on to do several experiments and activities, these coming from How the Body Works. We felt around for our pulses and learned that the feeling is the blood being pushed through our arteries. We made a stethoscope out of plastic tubing and a funnel so that we could hear our heart sounds. Then we discovered that our heart beats faster after exercise...and the more intense the exercise, the harder and faster it beats. We learned this by comparing our resting heart rates to our heart rates after one minute of exercise (jumping jacks) and two minutes of exercise (running around the block). We also learned a bit about blood, including some of the substances in our blood, how a scab is formed, and foods that can help our blood stay healthy.


There are several pretty neat concoctions in Hands-on Grossology - one for fake wounds and the other for making fake blood. I'm reluctant because of the mess they will make, but I know the kids would get a kick out of it and would likely make them again as they continue their battle scenes. We'll see if my reluctance lifts as the week progresses.
Wednesday, 4 September 2013
Aliens...but not what you think!
We kicked off the formal part of our homeschooling journey last year with a unit study on the solar system. It seemed to work for us to do a deep dive into a topic, with lots of hands-on activities and links to language arts and math. I loved reading the poetry we found, the paintings we created, and the Greek and Roman mythology we followed up every planet with. And the factoids and science behind the planets and the solar system as well, of course.
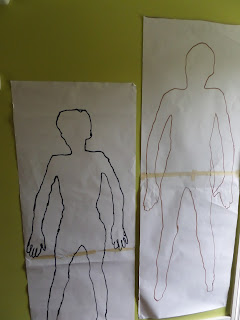
This year we're starting off the year with a deep dive into the human body, with any and all links to others in the animal world happily accepted. After chatting about all the different body parts - bones, muscles, organs, skin... - we took some time to trace each other. These life-size representations of the children are now hanging on our walls, and greet any and all visitors who make their way through our front door. As I was snapping pictures of my new paper greeters, I stood back and realized that they each, in their own unique way, look a bit like aliens. So alien greeters they are.

In all seriousness though, our intent is to learn about a new body system each week, culminating at the end of the week with drawing, cutting and pasting the system onto the tracings now gracing our walls. Our first look is into the digestive system. We've taken a first look at the organs within that system and read a really accessible book - What Happens to a Hamburger? - describing what happens during the digestive process. We found a length of rope and measured off the length of the digestive system if it was laid out flat on the ground as opposed to twisted and bunched together in the abdominal cavity of a person. We talked about how long food hangs out in each part of the digestive system. Fun, quick, hands-on, and great for all ages! And plenty of factoids too!
This year we're starting off the year with a deep dive into the human body, with any and all links to others in the animal world happily accepted. After chatting about all the different body parts - bones, muscles, organs, skin... - we took some time to trace each other. These life-size representations of the children are now hanging on our walls, and greet any and all visitors who make their way through our front door. As I was snapping pictures of my new paper greeters, I stood back and realized that they each, in their own unique way, look a bit like aliens. So alien greeters they are.


In all seriousness though, our intent is to learn about a new body system each week, culminating at the end of the week with drawing, cutting and pasting the system onto the tracings now gracing our walls. Our first look is into the digestive system. We've taken a first look at the organs within that system and read a really accessible book - What Happens to a Hamburger? - describing what happens during the digestive process. We found a length of rope and measured off the length of the digestive system if it was laid out flat on the ground as opposed to twisted and bunched together in the abdominal cavity of a person. We talked about how long food hangs out in each part of the digestive system. Fun, quick, hands-on, and great for all ages! And plenty of factoids too!
Tuesday, 3 September 2013
Welcome banner
As we enter our second homeschooling year, I wanted to create a simple yet meaningful visual to mark our transition back into our homeschooling routine. Something we could all be a part of and see ourselves in. Something unique. Something natural. I arrived at the idea of a banner with pieces created by each of us to represent what we would like the coming year to be.
The idea was grounded in a sweep of paper stars we used to have hanging in the hall that leads from our mudroom into the rest of the house. In India, people would hang a sweep of stars in their doorway to keep bad vibes out of the house, including the bad vibes either they or guests may be carrying as baggage. To this we married needle felting...handwork that my children have adored in the past, and have been away from for awhile. Each piece is as unique as its creator...a boat representing wanting to be in water...a bone representing wanting to work with animals...a hammer representing building things...a Christmas tree for sharing...a heart for sharing love and being a house full of love...a person that represents our entire family...a snowman representing winter fun.


May peace, love and light fill your home.
The idea was grounded in a sweep of paper stars we used to have hanging in the hall that leads from our mudroom into the rest of the house. In India, people would hang a sweep of stars in their doorway to keep bad vibes out of the house, including the bad vibes either they or guests may be carrying as baggage. To this we married needle felting...handwork that my children have adored in the past, and have been away from for awhile. Each piece is as unique as its creator...a boat representing wanting to be in water...a bone representing wanting to work with animals...a hammer representing building things...a Christmas tree for sharing...a heart for sharing love and being a house full of love...a person that represents our entire family...a snowman representing winter fun.


May peace, love and light fill your home.
Thursday, 18 July 2013
Club Day. The Nature Version.
When we awoke this morning, things looked a little on the grey side. I hurried over to the weather network and received a prediction that there would be rain in the morning - thundershowers, in fact. Hmmm...that forecast wasn't what Nature Club called for this morning. I headed over to Environment Canada's website, where they predicted rain in the afternoon. Much better news! And within ten minutes of reading that news, the skies did clear up and the sun was shining down upon us. It was like an omen telling me to simply trust the latter prediction.
Now that it's summer and our Nature Clubbers are available morning or afternoon (or evening too, I suppose), we're soaking up the opportunity to be outside before our little part of the planet heats up too much. I learned from last year's summer club days that the beautiful little people in our Nature Club tended to wilt under the sun's hot, hot rays. We also have much more time to do an activity and have free time, so we can plan more elaborate outings. Today's outing took us to a little berry patch just outside the city limits to pick some saskatoons.
Yes, our family has already picked many saskatoons this season. Soon my freezer will be full and I'll be wondering where I can store the blueberries that will come in the next couple of weeks. But the children who joined us today aren't as familiar with this humble berry, being from another province where they don't grow. So what better way to learn about local, seasonal, good foods, diversity, and the joys of simply being outdoors than to experience it?
For those of you who aren't familiar with saskatoons, they look similar to blueberries but have a taste that is all their own. They have a small seed inside them and while the seed is quite fibrous, it is edible. Here are a few of the ways we enjoy saskatoons...
~ saskatoon berry muffins
~ mix fresh or frozen saskatoons with yogurt, cereal, oatmeal or granola
~ saskatoon crisp or crumble
~ dropped into pancake batter, or served on top of freshly cooked pancakes
~ saskatoon berry jam
~ saskatoon berry syrup (we will be mixing our syrup with club soda, as an alternative to pop. A recipe for berry syrup is in The Homemade Pantry).
~ in fruit smoothies (but make sure there is a lot of liquid in your smoothie, as the saskatoons tend to absorb liquid and thicken the drink considerably
~ fruit popsicles
~ pie
~ just eaten by the handful!
The only thing I do not do with our saskatoon berries is dry them or make fruit leathers with them. For me, the seed tends to take centre stage when they are dried and they do not seem to keep their sweet taste when they are dried. Perhaps I dry them out too much, as I've read that others have successfully dried them.
If you're still not sure what to do with your saskatoons once they're picked, here are a few sites with recipes to get you started:
~ Recipes for tarts, scones, saskatoon berry loaf, crisp and syrup
~ Recipes including muffins, pudding, tea, vinaigrette, bars, squares and pancakes, just to name a few
~ Recipe for jam
Now that it's summer and our Nature Clubbers are available morning or afternoon (or evening too, I suppose), we're soaking up the opportunity to be outside before our little part of the planet heats up too much. I learned from last year's summer club days that the beautiful little people in our Nature Club tended to wilt under the sun's hot, hot rays. We also have much more time to do an activity and have free time, so we can plan more elaborate outings. Today's outing took us to a little berry patch just outside the city limits to pick some saskatoons.
Yes, our family has already picked many saskatoons this season. Soon my freezer will be full and I'll be wondering where I can store the blueberries that will come in the next couple of weeks. But the children who joined us today aren't as familiar with this humble berry, being from another province where they don't grow. So what better way to learn about local, seasonal, good foods, diversity, and the joys of simply being outdoors than to experience it?
For those of you who aren't familiar with saskatoons, they look similar to blueberries but have a taste that is all their own. They have a small seed inside them and while the seed is quite fibrous, it is edible. Here are a few of the ways we enjoy saskatoons...
~ saskatoon berry muffins
~ mix fresh or frozen saskatoons with yogurt, cereal, oatmeal or granola
~ saskatoon crisp or crumble
~ dropped into pancake batter, or served on top of freshly cooked pancakes
~ saskatoon berry jam
~ saskatoon berry syrup (we will be mixing our syrup with club soda, as an alternative to pop. A recipe for berry syrup is in The Homemade Pantry).
~ in fruit smoothies (but make sure there is a lot of liquid in your smoothie, as the saskatoons tend to absorb liquid and thicken the drink considerably
~ fruit popsicles
~ pie
~ just eaten by the handful!
The only thing I do not do with our saskatoon berries is dry them or make fruit leathers with them. For me, the seed tends to take centre stage when they are dried and they do not seem to keep their sweet taste when they are dried. Perhaps I dry them out too much, as I've read that others have successfully dried them.
If you're still not sure what to do with your saskatoons once they're picked, here are a few sites with recipes to get you started:
~ Recipes for tarts, scones, saskatoon berry loaf, crisp and syrup
~ Recipes including muffins, pudding, tea, vinaigrette, bars, squares and pancakes, just to name a few
~ Recipe for jam
Tuesday, 9 July 2013
Fortune teller
I found myself making lunch to the sound of a spelling bee today. Nicholas and Jaelyn were busy making paper fortune tellers, after receiving one as a gift yesterday. Nicholas folded up a few fortune tellers of his own, based on the construction of the one they were gifted, and the writing began.
"Mom, do you spell 'red' R-E-D?"
"Mom, is this how you spell 'successful'?
"Mom, how do you spell 'athlete'?" Upon which I would ask, "What is the first sound you hear? What sound do you hear next?" "What makes the middle 'e' say its name?" And voila - my child has spelled "athlete" on his own.
"Mom, do you have any ideas for a fortune? The hint word can only have an odd number of letters." (This was because the hint word was used rather than a colour name or a number that is often used before the fortune is revealed. If that makes sense.) And so I make up a few fortunes, based on what is top-of-mind for me today. "I am a kind person" is my response. What follows is a discussion of whether people are born innately kind or if kindness is something that must be learned...whether people choose to be kind or whether they forgo kindness simply because they don't know how to be nice. My writer ponders the question and determines for himself whether the fortune will read, "I am a kind person" or "I will be a kind person".
Maybe I should make up a homeschooling mom fortune teller for times when a reminder is needed. Here's what it might contain today...
~ Trust that children will learn what they need to learn, when they need to learn it
~ Just as Rome was not built in a day, a child's education will not be complete in a day, or a year! Learning may just go on until their last breath.
~ Free time provides open spaces for exploring and creativity
~ Smile!
~ Choose to be kind!
~ Follow the children and they will lead you to extraordinary places
~ Let the children learn to follow their hearts and they will find peace
~ Be the change you want to see in the world


"Mom, do you spell 'red' R-E-D?"
"Mom, is this how you spell 'successful'?
"Mom, how do you spell 'athlete'?" Upon which I would ask, "What is the first sound you hear? What sound do you hear next?" "What makes the middle 'e' say its name?" And voila - my child has spelled "athlete" on his own.
"Mom, do you have any ideas for a fortune? The hint word can only have an odd number of letters." (This was because the hint word was used rather than a colour name or a number that is often used before the fortune is revealed. If that makes sense.) And so I make up a few fortunes, based on what is top-of-mind for me today. "I am a kind person" is my response. What follows is a discussion of whether people are born innately kind or if kindness is something that must be learned...whether people choose to be kind or whether they forgo kindness simply because they don't know how to be nice. My writer ponders the question and determines for himself whether the fortune will read, "I am a kind person" or "I will be a kind person".
Maybe I should make up a homeschooling mom fortune teller for times when a reminder is needed. Here's what it might contain today...
~ Trust that children will learn what they need to learn, when they need to learn it
~ Just as Rome was not built in a day, a child's education will not be complete in a day, or a year! Learning may just go on until their last breath.
~ Free time provides open spaces for exploring and creativity
~ Smile!
~ Choose to be kind!
~ Follow the children and they will lead you to extraordinary places
~ Let the children learn to follow their hearts and they will find peace
~ Be the change you want to see in the world


Monday, 8 July 2013
The notebook
Magic can happen when little hands find their way to a small notebook with a cute puppy on the front. This is what my husband and I discovered this weekend after our daughter toted her prize notebook home from the library. The library was holding a summer reading contest, and the notebook was a prize for completing four hours of reading.
The magic in that notebook transformed my lovely seven-year-old into a sweet waitress who painstakingly made up menus for her guests, set the table, and served us our three-course supper with a smile. She refused to eat with us at the table because she was working, instead choosing to eat once all our dishes were cleared off. She somberly told me that I would not have to pay because I cooked the food, but that everyone would have to pay a dollar for their meal.


We had a repeat performance the next morning, too, for breakfast. Oh, how I love when these spontaneous bursts of learning happen right before my eyes!
The magic in that notebook transformed my lovely seven-year-old into a sweet waitress who painstakingly made up menus for her guests, set the table, and served us our three-course supper with a smile. She refused to eat with us at the table because she was working, instead choosing to eat once all our dishes were cleared off. She somberly told me that I would not have to pay because I cooked the food, but that everyone would have to pay a dollar for their meal.

We had a repeat performance the next morning, too, for breakfast. Oh, how I love when these spontaneous bursts of learning happen right before my eyes!
Sunday, 7 July 2013
I spy
Mysterious happenings...a case to be solved...searching for clues. It sounds like a fun way to enjoy the summer, or at least part of it. So when Jaelyn was invited to a birthday party and she was flipping through our issues of Alphabet Glue, she was taken with the idea of making a detective kit for her friend.
The detective kit we made contained secret code cards, an envelope of cut-out letters for writing anonymous notes, a detective notebook, and a magnifying glass. I sewed up a little bag (from Green Crafts for Children) to put all the detective tools in, then Jaelyn wrote a note with birthday wishes with invisible ink (lemon juice). We also found a copy of the first Nancy Drew book, The Secret of the Old Clock, for some nice family reading, and to help if her friend was having difficulty coming up with inspiration for a mystery to solve.


The detective kit we made contained secret code cards, an envelope of cut-out letters for writing anonymous notes, a detective notebook, and a magnifying glass. I sewed up a little bag (from Green Crafts for Children) to put all the detective tools in, then Jaelyn wrote a note with birthday wishes with invisible ink (lemon juice). We also found a copy of the first Nancy Drew book, The Secret of the Old Clock, for some nice family reading, and to help if her friend was having difficulty coming up with inspiration for a mystery to solve.


Thursday, 20 June 2013
Club Day. The Nature Version.
Since the spring equinox and the lacklustre attempt I made to celebrate the change of the seasons, I made a commitment to myself to do a better job to welcome summer. Given that the summer solstice is tomorrow, and with no other ideas really motivating me, I decided to flip through All Year Round for inspiration. And after a bit of humming and hawing, I chose to lead Nature Club in creating a paper summer solstice spiral.
Before we made our spirals, we talked a bit about the summer solstice. We talked about the equator and how it separates the northern and southern hemispheres. We talked about how summer in the north is winter in the south. We talked about the earth's axis, and how the tilt of the earth leads to the number of daylight hours changing throughout the year. This led us to a little chat of how ancient cultures created stories to explain the changing seasons and the changing positions of the sun. We talked about how some cultures believed that fairies would be full of mischief on midsummer's eve. Then I read a story out of All Year Round called The Rusty Dirk.
Once we finished the story and tidied up after our snack, we started making our summer solstice spiral. It was simply two smaller spirals inside one large spiral. The spirals stay in place by resting on top of wooden beads, which are secured with knots. The instructions called for gold foil, which I could not find. I replaced it with a gold translucent vellum paper, which was about normal paper weight. Next time, I would experiment with a heavier weight paper, even though I think that a heavy card stock would be too heavy. I found that our six- and seven-year olds were able to do the cutting fairly well, but some needed help with handling the slinky gold thread we used.

Welcome, summer!
Before we made our spirals, we talked a bit about the summer solstice. We talked about the equator and how it separates the northern and southern hemispheres. We talked about how summer in the north is winter in the south. We talked about the earth's axis, and how the tilt of the earth leads to the number of daylight hours changing throughout the year. This led us to a little chat of how ancient cultures created stories to explain the changing seasons and the changing positions of the sun. We talked about how some cultures believed that fairies would be full of mischief on midsummer's eve. Then I read a story out of All Year Round called The Rusty Dirk.
Once we finished the story and tidied up after our snack, we started making our summer solstice spiral. It was simply two smaller spirals inside one large spiral. The spirals stay in place by resting on top of wooden beads, which are secured with knots. The instructions called for gold foil, which I could not find. I replaced it with a gold translucent vellum paper, which was about normal paper weight. Next time, I would experiment with a heavier weight paper, even though I think that a heavy card stock would be too heavy. I found that our six- and seven-year olds were able to do the cutting fairly well, but some needed help with handling the slinky gold thread we used.

Welcome, summer!
Tuesday, 11 June 2013
Club Day. The Birds of Prey Version.
We're winding down the Birds of Prey navigation unit with a couple of hands-on, outdoor activities. I'm so thankful the weather is cooperating today. For today, we went straight to the park and sat under the shade of the trees for our snack, and then we went on a quest for treasure, using some real compasses.

I learned how to use a compass way back in grade 7. Needless to say, I've forgotten most of what I learned, but it came back quite easily, thanks to Nicholas knowing how to use a compass (from Cubs) and the few instructions that came with the compass. I also found help at this Learn Orienteering website. And we got some extra practice as we went out to the park to set up the quest.
Our quest was pretty simple - follow the orienteering instructions to locate each of the 8 flags scattered throughout the park. Each flag had a letter on it, and when all the letters were collected they could be unscrambled to make a word associated with our activity. Participants would take a flag from the last location and return it to me for a prize, to celebrate them successfully completing their quest.
I chose to use flags stapled to the ground instead of pylons or flags attached to poles or sticks because I wanted the group to rely more on their compasses than on using the visual cues. I also chose to set up two different routes so the groups wouldn't follow one another and not use the instructions. Lastly, I set up the teams so that there was one person with more experience teamed with one with less experience.
Here are the materials we used, and more thorough instructions for setting it up:
Materials for setup:
~ compass
~ clipboard with paper and pencil
~ scrap fabric for flags (one for each location, plus one for each child at the last station)
~ garden staples for securing the flags to the ground
~ permanent marker (if doing a word scramble)
~ pylons
Setup instructions:
1. Use the permanent marker to write a letter on each flag that will be used in the word scramble. We left the starting flag and the last flags blank.
2. Determine where your starting position will be and secure a flag to that spot using a garden staple.
3. Set pylons in the other locations. We used pylons to lay out the course so they would be clearly visible when we went to write up the instructions, and so that we could make different routes using the same locations for each team. My children set them randomly throughout the park. Some were close together and some were far apart - this doesn't matter too much.
4. Stand at your starting position and select the next location you will orient to. Using your compass, determine which direction you will need to face, in degrees. Then walk towards that location, counting the number of steps. Write down the degrees and the number of steps in your instructions. Replace the pylon with a flag and secure it with a garden staple. Note the letter on the flag so that you know the correct sequence for the word scramble.
5. From your current location, repeat step 4 until all locations have been included in the instructions.
6. If you want to write up several routes, simply put the pylons back over the flags, then repeat steps 4 and 5, using a different route. We made sure the start and end positions were the same for each iteration of the course.
Materials for orienteering game:
~ compasses (one for each child)
~ clipboard with instruction sheet and pencil or pen
~ prizes (optional)
Game instructions:
1. Review with the group how to use the compasses. Go through a couple of examples before they start their quest.
2. Divide the group into teams. I tried to match those more experienced with using a compass with those who were using one for the first time.
3. Describe the activity to the teams.
4. Give each team a clipboard with an instruction sheet and a pencil or pen.
5. Show each group where the start position is and let them begin!
I preferred using map compasses that had a travelling arrow for this activity. The travelling arrow (explained at the Learn Orienteering website) helped the children understand and see the direction they needed to move in better than other types of compasses without such a prominent feature. I also found that I needed to remind them to hold their compasses level, move slowly, and to pick out some sort of landmark to walk towards (instead of looking at their compass and wandering off course).
I think we will definitely do this activity again!

I learned how to use a compass way back in grade 7. Needless to say, I've forgotten most of what I learned, but it came back quite easily, thanks to Nicholas knowing how to use a compass (from Cubs) and the few instructions that came with the compass. I also found help at this Learn Orienteering website. And we got some extra practice as we went out to the park to set up the quest.
Our quest was pretty simple - follow the orienteering instructions to locate each of the 8 flags scattered throughout the park. Each flag had a letter on it, and when all the letters were collected they could be unscrambled to make a word associated with our activity. Participants would take a flag from the last location and return it to me for a prize, to celebrate them successfully completing their quest.
I chose to use flags stapled to the ground instead of pylons or flags attached to poles or sticks because I wanted the group to rely more on their compasses than on using the visual cues. I also chose to set up two different routes so the groups wouldn't follow one another and not use the instructions. Lastly, I set up the teams so that there was one person with more experience teamed with one with less experience.
Here are the materials we used, and more thorough instructions for setting it up:
Materials for setup:
~ compass
~ clipboard with paper and pencil
~ scrap fabric for flags (one for each location, plus one for each child at the last station)
~ garden staples for securing the flags to the ground
~ permanent marker (if doing a word scramble)
~ pylons
Setup instructions:
1. Use the permanent marker to write a letter on each flag that will be used in the word scramble. We left the starting flag and the last flags blank.
2. Determine where your starting position will be and secure a flag to that spot using a garden staple.
3. Set pylons in the other locations. We used pylons to lay out the course so they would be clearly visible when we went to write up the instructions, and so that we could make different routes using the same locations for each team. My children set them randomly throughout the park. Some were close together and some were far apart - this doesn't matter too much.
4. Stand at your starting position and select the next location you will orient to. Using your compass, determine which direction you will need to face, in degrees. Then walk towards that location, counting the number of steps. Write down the degrees and the number of steps in your instructions. Replace the pylon with a flag and secure it with a garden staple. Note the letter on the flag so that you know the correct sequence for the word scramble.
5. From your current location, repeat step 4 until all locations have been included in the instructions.
6. If you want to write up several routes, simply put the pylons back over the flags, then repeat steps 4 and 5, using a different route. We made sure the start and end positions were the same for each iteration of the course.
Materials for orienteering game:
~ compasses (one for each child)
~ clipboard with instruction sheet and pencil or pen
~ prizes (optional)
Game instructions:
1. Review with the group how to use the compasses. Go through a couple of examples before they start their quest.
2. Divide the group into teams. I tried to match those more experienced with using a compass with those who were using one for the first time.
3. Describe the activity to the teams.
4. Give each team a clipboard with an instruction sheet and a pencil or pen.
5. Show each group where the start position is and let them begin!
I preferred using map compasses that had a travelling arrow for this activity. The travelling arrow (explained at the Learn Orienteering website) helped the children understand and see the direction they needed to move in better than other types of compasses without such a prominent feature. I also found that I needed to remind them to hold their compasses level, move slowly, and to pick out some sort of landmark to walk towards (instead of looking at their compass and wandering off course).
I think we will definitely do this activity again!
Friday, 7 June 2013
Club Day. The Nature Version.
My, yesterday was a busy day. On top of the birthday crafting and celebration, there was also Nature Club. Our mission yesterday was to make a driftwood boat that would float and keep its sail out of the water. I loved this activity because it gave us plenty of room to experiment and try different variables, without being too overwhelming.
Supplies for this activity were minimal - smaller chunks of wood (that the Clubbers found by rummaging through our bin of kindling), small sticks for the mast, scrap fabric for the sails (courtesy my scrap fabric basket), plasticine, scissors and glue. Oh, and buckets of water to test out our creations, of course.
I happened to have an already completed driftwood boat on hand, so we used it to kick off our meeting and to make a few discoveries. The piece of driftwood used in this boat was quite narrow, and it was quite tippy in the water as a result. This led us to discuss that perhaps a wider piece of wood would work best for our boats. We also discovered that white glue is soluble when it gets wet, so we had best use a different type of glue when attaching our sails to the masts (we used a hot glue gun).
Next, we attached our masts to the boat by wrapping the plasticine around one end of the stick, then forming a base so that the plasticine would stick to the wood. We found that adding this weight, including its placement on the wood, could change how well the wood floated and how stable the boat was.
Finally, the Clubbers raided my scrap fabric basket and cut out their own sails. I then glued them to their masts and they tried one final time to see if their boats would stay upright. Some did and some didn't. We found that sails that were centered on the masts worked best, as well as masts that were shorter.
Supplies for this activity were minimal - smaller chunks of wood (that the Clubbers found by rummaging through our bin of kindling), small sticks for the mast, scrap fabric for the sails (courtesy my scrap fabric basket), plasticine, scissors and glue. Oh, and buckets of water to test out our creations, of course.
I happened to have an already completed driftwood boat on hand, so we used it to kick off our meeting and to make a few discoveries. The piece of driftwood used in this boat was quite narrow, and it was quite tippy in the water as a result. This led us to discuss that perhaps a wider piece of wood would work best for our boats. We also discovered that white glue is soluble when it gets wet, so we had best use a different type of glue when attaching our sails to the masts (we used a hot glue gun).
 |
| Our tippy example boat |
Finally, the Clubbers raided my scrap fabric basket and cut out their own sails. I then glued them to their masts and they tried one final time to see if their boats would stay upright. Some did and some didn't. We found that sails that were centered on the masts worked best, as well as masts that were shorter.
 |
| A boat that floats! |
Thursday, 30 May 2013
Brown sugar
We are starting to prepare for a family get-together and our first task, at Jaelyn's request, was to make chocolate chip cookies. After discovering our handed-down recipe was not where it was supposed to be and a phone call to grandma later, we gathered our ingredients, only to discover we were short of a key ingredient - brown sugar.
Not wanting to make a trip to the grocery store, I mused that we would simply make our own brown sugar. I don't know what caused me to even think such a thing, but once we were off the phone with recipe in hand, I grabbed Homemade Pantry. If I were to find how to make such a thing without turning on the computer, it would be there. And it was! All we needed was sugar and molasses - easy peasy!
As we poured those two humble ingredients into our stand mixer and watched the molasses clump into a gooey blob with the sugar, we talked a bit about where sugar comes from and how it is processed. As we scraped the bowl down, we started to get a glimpse of what our brown sugar would look like. Eyes were glued to its progress, and mouths were anxious for a taste. What patient babes I had in my kitchen this afternoon!


Soon, in not too much time, our brown sugar was ready. It looks just like the store-bought stuff, except it has such a lovely soft, moist quality to it. I don't think I will ever go back to buying store-bought brown sugar again (especially when it costs more for less)!

Just as quickly, our chocolate chip cookies were in and out of the oven. We've solemnly sworn that we will share just one before we hide them away in the freezer until the weekend. Wish us luck on that front!


Not wanting to make a trip to the grocery store, I mused that we would simply make our own brown sugar. I don't know what caused me to even think such a thing, but once we were off the phone with recipe in hand, I grabbed Homemade Pantry. If I were to find how to make such a thing without turning on the computer, it would be there. And it was! All we needed was sugar and molasses - easy peasy!
As we poured those two humble ingredients into our stand mixer and watched the molasses clump into a gooey blob with the sugar, we talked a bit about where sugar comes from and how it is processed. As we scraped the bowl down, we started to get a glimpse of what our brown sugar would look like. Eyes were glued to its progress, and mouths were anxious for a taste. What patient babes I had in my kitchen this afternoon!


Soon, in not too much time, our brown sugar was ready. It looks just like the store-bought stuff, except it has such a lovely soft, moist quality to it. I don't think I will ever go back to buying store-bought brown sugar again (especially when it costs more for less)!

Just as quickly, our chocolate chip cookies were in and out of the oven. We've solemnly sworn that we will share just one before we hide them away in the freezer until the weekend. Wish us luck on that front!


Tuesday, 28 May 2013
Club Day. The Birds of Prey version.
Oh, I am so glad that we had an opportunity to test-drive today's Birds of Prey navigation-themed project before the Club actually showed up.
I've been so excited and pleased with the projects in Tools of Navigation that I had great expectations for the homemade compass project described in the book. It's a dry compass, which I had difficulty finding projects and instructions for making on the Internet. The premise is that a milk carton bottom serves as the box that the compass resides in. A heavy paperclip is magnetized, then sandwiched between two circular pieces of paper (one a cardboard and the other plain printer paper), which forms the compass rose. Lastly, the rose balances on a nail or screw that comes up through the bottom of the milk carton.
Our problems began early during our experiments. The book specified that the nail should be steel and not iron, presumably because the nail should not be attracted to the magnetized paperclip in the rose. As I dug through the containers of nails and screws in our garage, I discovered that they were all attracted to magnets. An internet search revealed that plain old steel will usually be attracted to magnets, but certain types of stainless steel will not. My husband wound up finding five stainless steel screws in the basement, and my dad supplemented our collection.
Then we tried to build the contraption. We found it extremely tricky to balance the rose on the screw, even before trying to sandwich the magnetized paperclip, and I expect that it wouldn't have stayed in place with the slightest movement or gentle breeze. After three attempts, we decided to ditch the dry compass and went with a tried and true do-it-yourself water compass project.
The water compass project is quite easy, and there are may sources on the internet for finding instructions for how to do it. The materials needed were simple - a circular piece of cork, a needle, a magnet, and something to hold water. We cut up a few corks we happened to have handy to serve as our compass rose. Then we magnetized a sewing needle by running a magnet over it for several minutes. Lastly, we used the bottoms of the milk containers that we were planning to use for the dry compasses to hold the water. The magnetized needle was then inserted through the side of the cork, and then the cork and needle was placed in the water.

I read a bit of the history and science of compasses to the Club as they magnetized their needles (from Tools of Navigation). Did you know that while the Chinese invented the first compass (in 210 BCE), they didn't actually use it for navigation? Instead, it was used in feng shui. In fact, the first known recorded use of a compass for navigation in the western culture wasn't until the 1100's CE.
We learn something new every day, don't we?
I've been so excited and pleased with the projects in Tools of Navigation that I had great expectations for the homemade compass project described in the book. It's a dry compass, which I had difficulty finding projects and instructions for making on the Internet. The premise is that a milk carton bottom serves as the box that the compass resides in. A heavy paperclip is magnetized, then sandwiched between two circular pieces of paper (one a cardboard and the other plain printer paper), which forms the compass rose. Lastly, the rose balances on a nail or screw that comes up through the bottom of the milk carton.
Our problems began early during our experiments. The book specified that the nail should be steel and not iron, presumably because the nail should not be attracted to the magnetized paperclip in the rose. As I dug through the containers of nails and screws in our garage, I discovered that they were all attracted to magnets. An internet search revealed that plain old steel will usually be attracted to magnets, but certain types of stainless steel will not. My husband wound up finding five stainless steel screws in the basement, and my dad supplemented our collection.
Then we tried to build the contraption. We found it extremely tricky to balance the rose on the screw, even before trying to sandwich the magnetized paperclip, and I expect that it wouldn't have stayed in place with the slightest movement or gentle breeze. After three attempts, we decided to ditch the dry compass and went with a tried and true do-it-yourself water compass project.
The water compass project is quite easy, and there are may sources on the internet for finding instructions for how to do it. The materials needed were simple - a circular piece of cork, a needle, a magnet, and something to hold water. We cut up a few corks we happened to have handy to serve as our compass rose. Then we magnetized a sewing needle by running a magnet over it for several minutes. Lastly, we used the bottoms of the milk containers that we were planning to use for the dry compasses to hold the water. The magnetized needle was then inserted through the side of the cork, and then the cork and needle was placed in the water.

I read a bit of the history and science of compasses to the Club as they magnetized their needles (from Tools of Navigation). Did you know that while the Chinese invented the first compass (in 210 BCE), they didn't actually use it for navigation? Instead, it was used in feng shui. In fact, the first known recorded use of a compass for navigation in the western culture wasn't until the 1100's CE.
We learn something new every day, don't we?
Thursday, 23 May 2013
Club Day. The Nature Version.
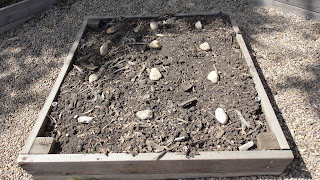
Nature Club took another step forward in making the pizza garden a reality. We got their hands dirty today, as we moved the peppers we started indoors out to one of the garden boxes. As we worked, we talked about why there was wood (mulch) in the garden and the purpose it serves, which is to allow the soil to retain as much moisture as possible, as opposed to it evaporating. We walked through the steps (dig a hole, gently push the seedling out of its cell, place it upright gently in the hole, cover, and replace wood chips as necessary. We served our little peppers a bit of compost tea, then gave them a generous watering. I was amused that the Clubbers thought that a little water bottle of water was sufficient for their plants. They were amused when I squirted myself in the face as I replaced the watering lid to the water bottle (I found these awesome lids at Lee Valley, so each child can have a water bottle of their own to use).

How did the Clubbers know where to dig the holes for their seedlings? I placed large rocks in the garden box in the spots where I wanted the seedlings to go. Each Clubber got a row to work with - they would remove a rock and go through the steps as independently as they felt they could. My main job was to help get the seedlings out, and warn if the digging of one child would bury the seedling another had planted.
We also prepared a pot and moved one spindly tomato into it, as I've decided the rest of the tomatoes will go out into the community garden plot, where they will receive tons of sunshine. This way, I can do a better job rotating the produce we grow, and hopefully we'll see the same bumper crop this year that we had last year at the community garden! The girls did most of the work to prepare the pot. They lined the bottom with small rocks, collected some composted manure from our neighbour, poured soil, mixed some Soil Moist (which we're trying in our clay pots for the first time), then planted and watered.


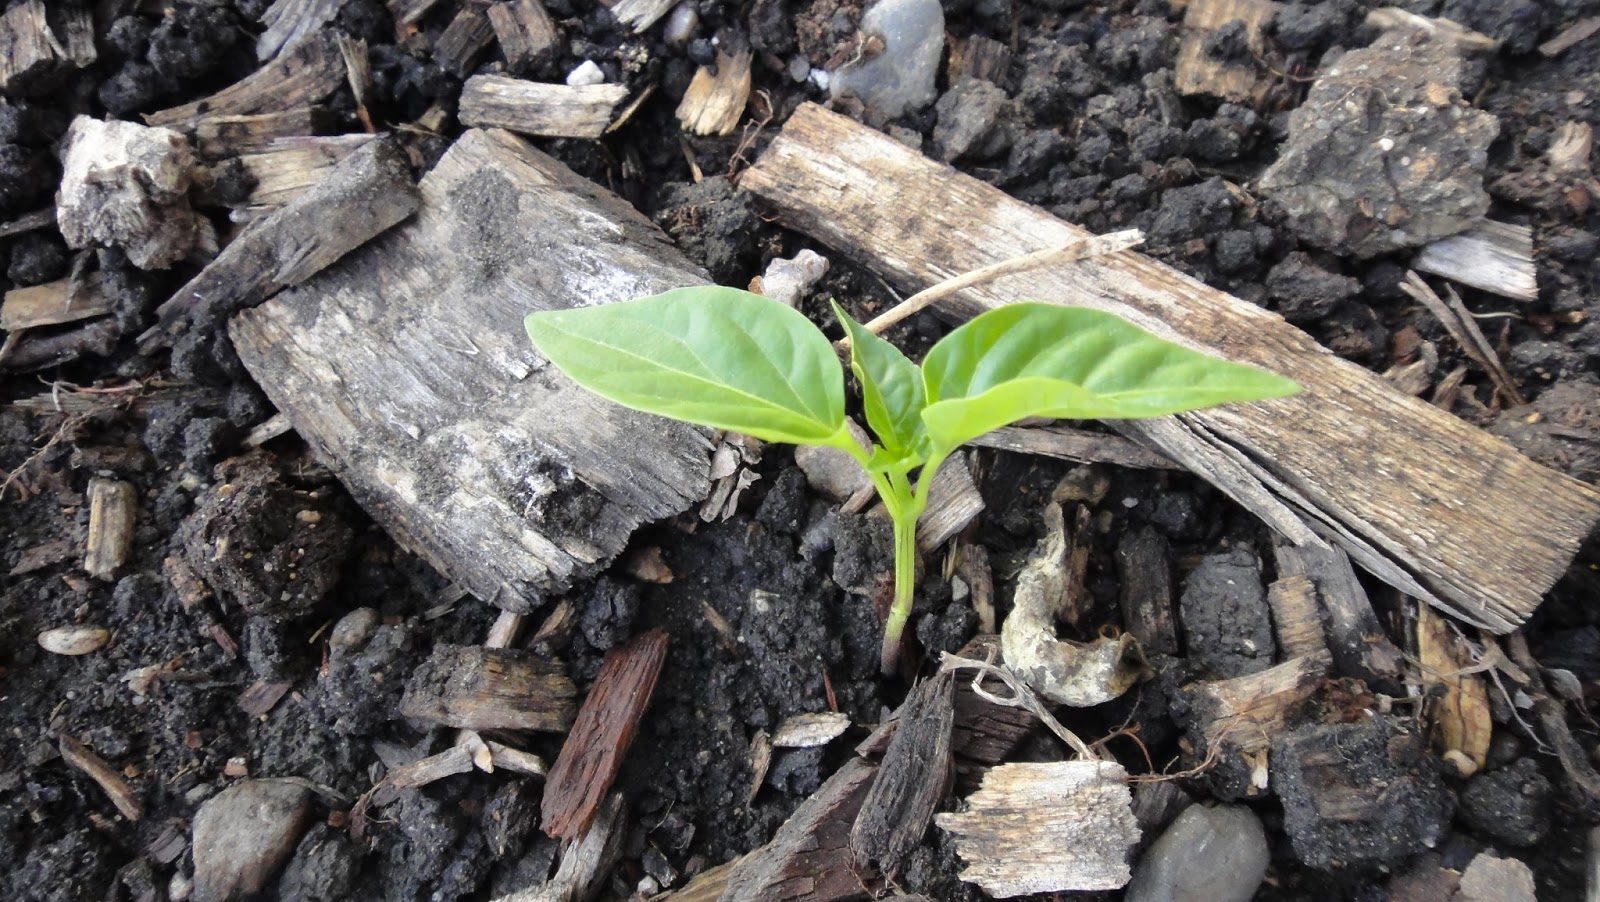
How did the Clubbers know where to dig the holes for their seedlings? I placed large rocks in the garden box in the spots where I wanted the seedlings to go. Each Clubber got a row to work with - they would remove a rock and go through the steps as independently as they felt they could. My main job was to help get the seedlings out, and warn if the digging of one child would bury the seedling another had planted.

We also prepared a pot and moved one spindly tomato into it, as I've decided the rest of the tomatoes will go out into the community garden plot, where they will receive tons of sunshine. This way, I can do a better job rotating the produce we grow, and hopefully we'll see the same bumper crop this year that we had last year at the community garden! The girls did most of the work to prepare the pot. They lined the bottom with small rocks, collected some composted manure from our neighbour, poured soil, mixed some Soil Moist (which we're trying in our clay pots for the first time), then planted and watered.


Tuesday, 21 May 2013
Slow gardening
It appears that we are (I am) embracing the concept of slow gardening. I'm finding it easier to let go of the need to get it all in quickly and in one giant attempt. Yes, this garden of ours is going to go in nice and slow.
I think that children will be more willing to help if they know that there will be a finish time. While I struggle with the seeming paradox of keeping the peace and teaching to finish the job that is started, I think I should be able to manage our garden work in bite-sized chunks. So, today, in our hour-long window, we planted zucchini, cucumbers, sui choy, pak choy and broccoli. We did a bit of watering. We stared wide-eyed as an ant dragged the body of a much larger insect along the dirt. And we did a bit of garden art.
Our garden art project came about from a deficiency in last year's garden. Last year, I did a poor job of marking our rows. In the heat of the moment, I just didn't take the time to purchase or make proper row markers. So this year, I thought we would use paint stir sticks (free!) to mark the rows and the children could decorate them, if they wanted to. But it turns out that paint stir sticks are scarce right now, and we needed to make new fences for our peas to grow anyway, so we purchased longer 1" x 2" than we needed and cut them down, with the short left-over ends being our row markers. As one set of large hands was finishing up his tasks while the smallest was starting to get restless, I brought out the acrylic paint, the paintbrushes, and let them decorate (and label) to their heart's content. I'm feeling as though I came across a brilliant idea to keep the littler hands occupied while the larger ones and I do our garden work, as I can see there will be plenty of leftover space for future paintings. All I need to do is add the painting supplies to our gardening stuff and we're set!


I think that children will be more willing to help if they know that there will be a finish time. While I struggle with the seeming paradox of keeping the peace and teaching to finish the job that is started, I think I should be able to manage our garden work in bite-sized chunks. So, today, in our hour-long window, we planted zucchini, cucumbers, sui choy, pak choy and broccoli. We did a bit of watering. We stared wide-eyed as an ant dragged the body of a much larger insect along the dirt. And we did a bit of garden art.
Our garden art project came about from a deficiency in last year's garden. Last year, I did a poor job of marking our rows. In the heat of the moment, I just didn't take the time to purchase or make proper row markers. So this year, I thought we would use paint stir sticks (free!) to mark the rows and the children could decorate them, if they wanted to. But it turns out that paint stir sticks are scarce right now, and we needed to make new fences for our peas to grow anyway, so we purchased longer 1" x 2" than we needed and cut them down, with the short left-over ends being our row markers. As one set of large hands was finishing up his tasks while the smallest was starting to get restless, I brought out the acrylic paint, the paintbrushes, and let them decorate (and label) to their heart's content. I'm feeling as though I came across a brilliant idea to keep the littler hands occupied while the larger ones and I do our garden work, as I can see there will be plenty of leftover space for future paintings. All I need to do is add the painting supplies to our gardening stuff and we're set!


Subscribe to:
Posts (Atom)