Many of our spaces are in need of a purge. There's messy build-up in pockets, corners, and rooms. In an attempt to just get a couple of spaces to the point that I could walk into them without cringing, I simply dumped what I could find into laundry baskets or totes and hauled them to my room, with good intentions to get through them in peace and without a little one wandering in and inspecting every item that was in the recycle/toss and giveaway piles.
For the most part, it worked. Except that there is now more messy build-up in my room. Clothes that no longer fit, or need to be mended, or moved to the next stage of their lives (think pants that will now be shorts due to the holes in the knees), were piled on the chest at the foot of my bed. I was feeling that exasperated, cringe-like feeling every time I entered my room now! It turns out there is no escape from it unless it is dealt with once and for all.
So a couple of hours were spent with my sewing machine to reduce the mountainous pile down to a manageable molehill. I think I put together a pretty well-rounded summer wardrobe for my older two, who now have an abundance of shorts.
And what to do with the cut-off legs below the hole? It turns out they are the perfect size for most of the panels in the Indi-go bag pattern that is in Reinvention: Sewing with Rescued Materials. My pile of jeans is now down to this:
Ahhh, now a wee bit more room for clarity!
Showing posts with label crafting. Show all posts
Monday, 17 March 2014
Saturday, 1 February 2014
Kung hsi fa-ts'ai!
The Year of the Horse galloped joyfully into our house last night. After all the legends, folktales and stories telling of the Chinese New Year and its customs had been told, the crafts and decorations had been made and hung, music had been discovered, recipes poured over, and greetings and tidings had been recited and learned, it was time for a New Year celebration feast.
We invited family to join us. We greeted each guest with an orange offering and shouted out a jubilant kung hsi fa-ts'ai! Noisemakers and tangrams were ready to entertain the little ones while we put the finishing touches on the meal. On the menu were potstickers, spring rolls (from our ReBar cookbook), roast chicken, Chinese greens and fried rice (from The Young Chef's Chinese Cookbook). Dessert was oranges followed by peanut cookies. Yum! We sent the children home with Lai-See (Chinese lucky money).
May you enjoy good luck, good health, and prosperity in this Year of the Horse!
Thursday, 16 January 2014
Slow crafting
Awhile back, my mom mentioned to me that she wanted to frame a piece of art I'd made in high school. I looked at her curiously and wondered what possible piece of artwork she could have in her possession. Then she showed me the piece...it was a plant, a palm to be more precise, and it was drawn in ink using a technique called pointillism. As I gazed at the picture, I wondered how I actually drew the thing - did I copy it from somewhere? Borrowed someone else's sketch and then started putting dots of ink where it felt right? As you may be able to guess by now, I don't consider myself to be much of an artist.
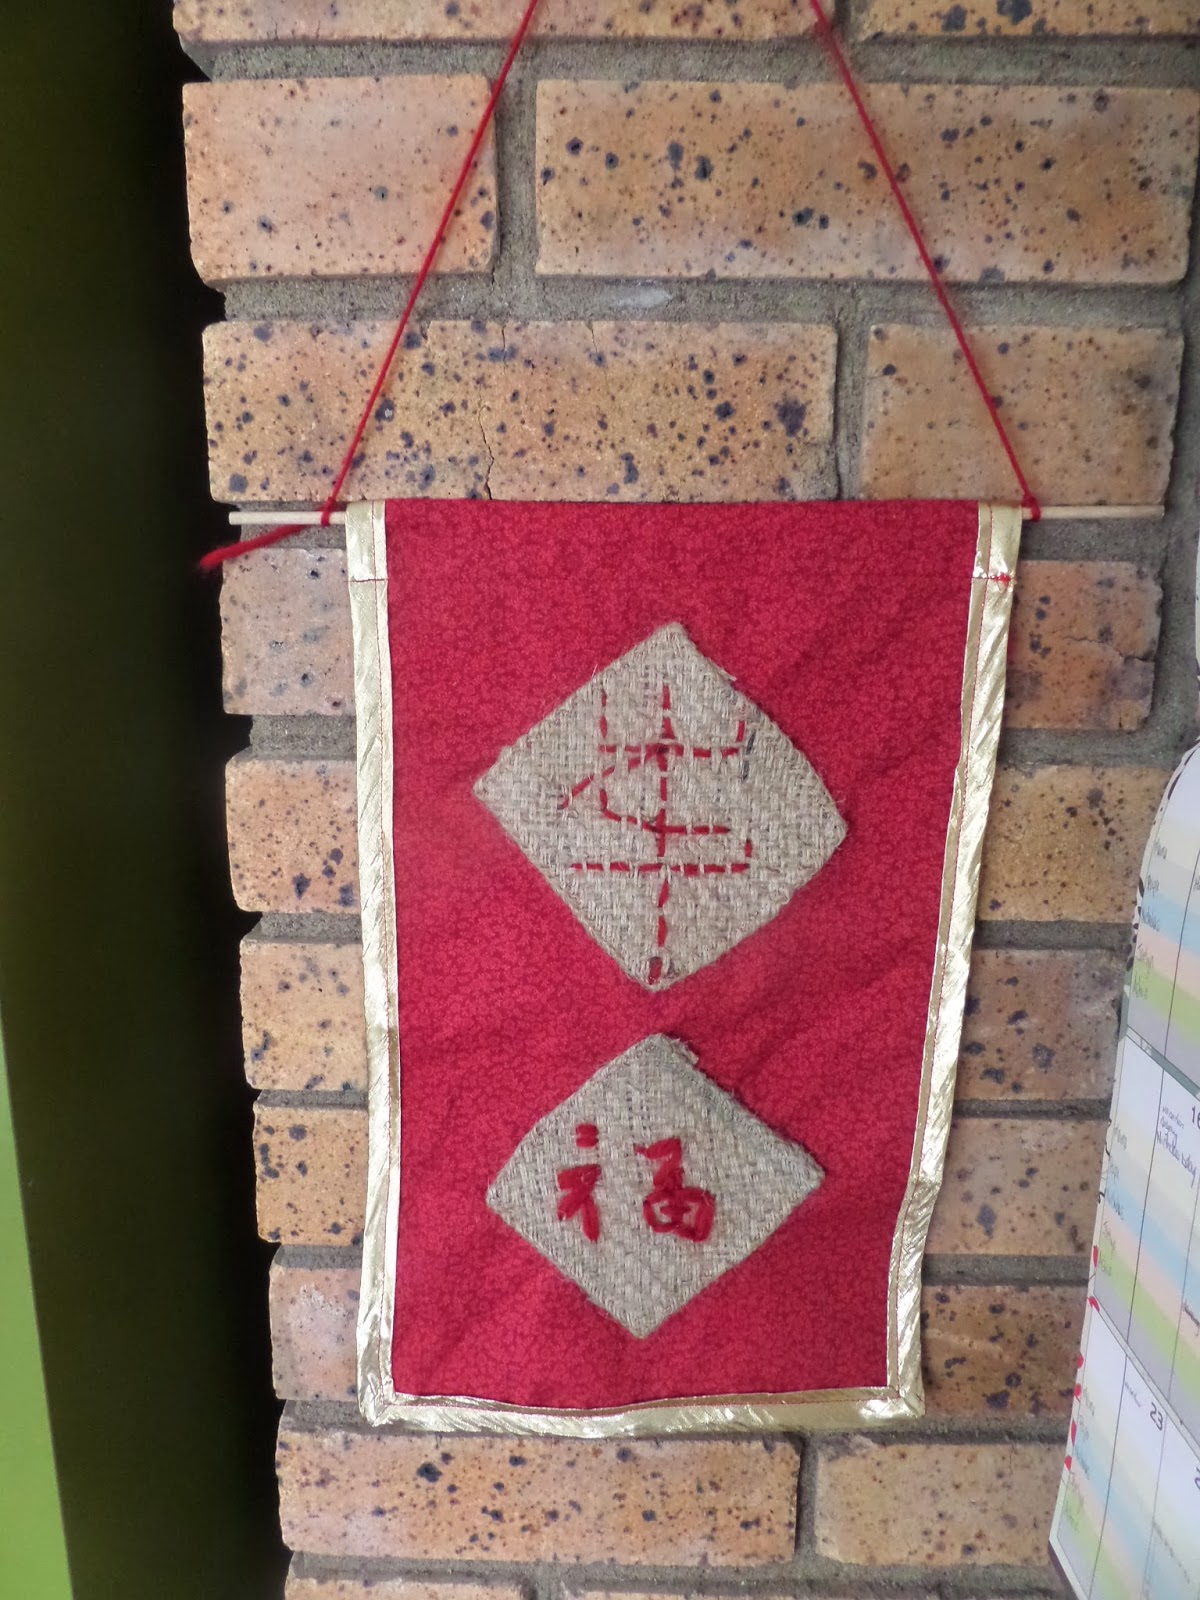
But there are some parallels between this drawing experience, and some of the other crafting we do around here. I seem to recall that drawing taking forever to complete, and I wonder exactly how many dots of ink it took to finish it. Likewise, the sweater I'm knitting is also taking forever, but the half that I've finished looks beautiful. And so did the sweet little chicks that I needle-felted for Christmas last year. Lately, the few items I've tried to model with modelling beeswax have taken a bit more time than if I had tried to create them with play dough or modelling clay, but they've turned out nonetheless. And we tried out some introductory embroidery with the Chinese New Year in mind too, which is a vastly slower experience than painting the symbols on paper.
So what is it that can make these slow crafts so accessible, with a healthy dose of patience? I wonder if the pace of a slow craft makes it easier for someone like me - someone who was not born with the instincts and skills for being at ease creating tangible things - to create something identifiable. I don't necessarily need a pattern in order to be successful. I can design and create all on my own.
If I were to sew a chick together, for example, I would be done in a fraction of the time it would take to knit or needle-felt. I would most likely copy a pattern - someone else's design that I've simply followed the instructions to complete. If I were to wing it on my own, I would essentially have one shot to get it right, and that shot comes and goes in the blink of an eye. In the case of sewing, once the fabric is cut, it either works or it doesn't. Sure, it could be tweaked, but it's also quite likely it would need a complete do-over. With needle-felting, however, I found it pretty much impossible to make a mistake. Fiber was added a little bit at a time. There was time between needle strikes to pause and consider what needed to happen next. The gradual evolution of a ball to a ball with a beak at a snail's pace allowed my clumsy hands to make mistakes and see them before they became unfixable.
And I've felt, as I've worked a ball of wax into a crown for our little Bruno the Bear (inspired by a story in the Book of Fairy Princes), my breathing slow, my muscles relax, my mind sharpen in concentration, my whole self honed in to the present moment. And I see why exposing my little ones to such handwork is so great for them. They get to experience, without being begged and pleaded with, what many adults flock to yoga and meditation classes for. They get to see and feel their heads, their hearts, and their hands working as one. For a moment, nothing matters but this expression of themselves they are working hard to create. There is peace inside and outside. It's a beautiful place to be.
But there are some parallels between this drawing experience, and some of the other crafting we do around here. I seem to recall that drawing taking forever to complete, and I wonder exactly how many dots of ink it took to finish it. Likewise, the sweater I'm knitting is also taking forever, but the half that I've finished looks beautiful. And so did the sweet little chicks that I needle-felted for Christmas last year. Lately, the few items I've tried to model with modelling beeswax have taken a bit more time than if I had tried to create them with play dough or modelling clay, but they've turned out nonetheless. And we tried out some introductory embroidery with the Chinese New Year in mind too, which is a vastly slower experience than painting the symbols on paper.
So what is it that can make these slow crafts so accessible, with a healthy dose of patience? I wonder if the pace of a slow craft makes it easier for someone like me - someone who was not born with the instincts and skills for being at ease creating tangible things - to create something identifiable. I don't necessarily need a pattern in order to be successful. I can design and create all on my own.
If I were to sew a chick together, for example, I would be done in a fraction of the time it would take to knit or needle-felt. I would most likely copy a pattern - someone else's design that I've simply followed the instructions to complete. If I were to wing it on my own, I would essentially have one shot to get it right, and that shot comes and goes in the blink of an eye. In the case of sewing, once the fabric is cut, it either works or it doesn't. Sure, it could be tweaked, but it's also quite likely it would need a complete do-over. With needle-felting, however, I found it pretty much impossible to make a mistake. Fiber was added a little bit at a time. There was time between needle strikes to pause and consider what needed to happen next. The gradual evolution of a ball to a ball with a beak at a snail's pace allowed my clumsy hands to make mistakes and see them before they became unfixable.
And I've felt, as I've worked a ball of wax into a crown for our little Bruno the Bear (inspired by a story in the Book of Fairy Princes), my breathing slow, my muscles relax, my mind sharpen in concentration, my whole self honed in to the present moment. And I see why exposing my little ones to such handwork is so great for them. They get to experience, without being begged and pleaded with, what many adults flock to yoga and meditation classes for. They get to see and feel their heads, their hearts, and their hands working as one. For a moment, nothing matters but this expression of themselves they are working hard to create. There is peace inside and outside. It's a beautiful place to be.
Wednesday, 8 January 2014
Queen for a day
I can't believe that I was nervous about how the afternoon would unfold as we returned from our after-lunch jaunt outside. I was feeling unsettled that there was absolutely nothing scheduled for the afternoon. While Nicholas had mentioned some things he wanted to do, I had visions of my girls running wild through the house with every possible costume we owned clinging to them in some fashion, tearing apart the basement my husband had worked so hard to clean up, then proceeding to leave mayhem in their wake in every other room they visited. It would have looked something like this:
And then my Jaelyn, the Queen of the Day, led our afternoon activities. Queen of the Day, you ask? It arose from my attempt to bring in our Monday with some festive cheer. I told them several stories inspired by Three Kings Day, and then I baked a cake with a dry bean hidden in it. Whoever found the bean in their piece of cake was declared King or Queen of the Day! The newly minted royalty was given the responsibility to call the shots - in an innocent, fun sort of way - for the rest of the day. Today the bean was found by Miss Jaelyn.
First she led us through some painting. She received some Glob Paint for Christmas and has been waiting patiently to try it out. At her command, we mixed the lovely-smelling pigments with water and painted what came to us...stormy water with a compass, abstract toddler art, and a garden scene graced our walls once they were done.
Then Queen Jaelyn brought up our Create-A-Story game. I love this game, but I haven't pushed it on my kids and it's only been out a couple of times. It provides all the elements of a story - characters, setting, plot, descriptive words, resolution and a lesson learned - and it's the writer's job to put all these seemingly unrelated items together into a coherent story. We played storyteller for well over an hour. While Nicholas and I didn't get to actually write our stories, I'm looking forward to incorporating his story elements into an introduction to free-writing in the next day or two. Jaelyn's story was about a team of scuba divers who travelled to the ocean floor only to find a city there. It's inhabitants wanted the divers to take them to the surface, but the divers refused. This angered the beautiful sea queen, who trapped them with blue slime. Thankfully, there was a gorilla still aboard the scuba divers' boat who had a crystal ball and saw that his friends were in trouble and rescued them. Later, our heroine (Jaelyn) and the gorilla travelled somewhere else and found a treasure chest. They returned to land and gave it to the mayor, who rewarded them with a million dollars. During the mayor's announcement, onlookers made fun of the gorilla, but Jaelyn decided not to listen to those people because the gorilla was her best friend. Love it!
After that...well, I think the girls did run amok. But most of the costumes stayed in their home and those that were brought out were back in their places before bedtime. Thanks to the command of our Queen of the Day.
And then my Jaelyn, the Queen of the Day, led our afternoon activities. Queen of the Day, you ask? It arose from my attempt to bring in our Monday with some festive cheer. I told them several stories inspired by Three Kings Day, and then I baked a cake with a dry bean hidden in it. Whoever found the bean in their piece of cake was declared King or Queen of the Day! The newly minted royalty was given the responsibility to call the shots - in an innocent, fun sort of way - for the rest of the day. Today the bean was found by Miss Jaelyn.
First she led us through some painting. She received some Glob Paint for Christmas and has been waiting patiently to try it out. At her command, we mixed the lovely-smelling pigments with water and painted what came to us...stormy water with a compass, abstract toddler art, and a garden scene graced our walls once they were done.
Then Queen Jaelyn brought up our Create-A-Story game. I love this game, but I haven't pushed it on my kids and it's only been out a couple of times. It provides all the elements of a story - characters, setting, plot, descriptive words, resolution and a lesson learned - and it's the writer's job to put all these seemingly unrelated items together into a coherent story. We played storyteller for well over an hour. While Nicholas and I didn't get to actually write our stories, I'm looking forward to incorporating his story elements into an introduction to free-writing in the next day or two. Jaelyn's story was about a team of scuba divers who travelled to the ocean floor only to find a city there. It's inhabitants wanted the divers to take them to the surface, but the divers refused. This angered the beautiful sea queen, who trapped them with blue slime. Thankfully, there was a gorilla still aboard the scuba divers' boat who had a crystal ball and saw that his friends were in trouble and rescued them. Later, our heroine (Jaelyn) and the gorilla travelled somewhere else and found a treasure chest. They returned to land and gave it to the mayor, who rewarded them with a million dollars. During the mayor's announcement, onlookers made fun of the gorilla, but Jaelyn decided not to listen to those people because the gorilla was her best friend. Love it!
After that...well, I think the girls did run amok. But most of the costumes stayed in their home and those that were brought out were back in their places before bedtime. Thanks to the command of our Queen of the Day.
Thursday, 12 December 2013
Crafting up a storm
Making something with our hands is a daily occurrence around here, even if it wasn't 13 days before Christmas. In fact, as I look around the living and dining areas, I'd be inclined to say crafting happens multiple times during our days. Here are just a snippet of what we've been up to...
| Painting with watercolours |
| Sewing with supervision |
| Making a gift for nature with bread, peanut butter and sunflower seeds |
| Rolling candles from beeswax sheets |
| Hanging a star each day until Christmas |
| A freezer-paper stencil work-in-progress |
| One of these nutcrackers will turn into a prince, but we don't know which one, so they all need a crown made of modelling clay |
| Paper snowflakes with Nature Club |
| A crocheted star for the one in our lives who shares his light through his optimism - see here for the pattern |
| A felted Christmas tree - because a wee bit more greenery is nice! |
Wednesday, 23 October 2013
Jambo
('Jambo' means 'Hello' in Swahili)
I'm not sure if I've mentioned how much I love, love, love our homeschool co-op. I've loved how the children have been engaged about the countries we've visited thus far. I've loved how the activity for the week has been played out by my kids once we've arrived back home, sometimes for days on end. I've loved the challenge of learning about different places and weaving together aspects of history, culture, geography, and craft into a tiny 45 minute block.
Today our group learned some more about Kenya. Last week, the children learned what the life of a typical Kenyan child might be like and finished their day by preparing and sharing a simple meal. This week, we looked into symbolism that weaves its way into both fine art and utilitarian artifacts - how the shapes and colours used by a culture have special significance and learning about that significance so we could appreciate the story an artifact tells.
I started our discussion by showing a picture of the Kenyan flag. We noticed the different colours and the shield and spear design in the middle. We wondered why the country picked the colours it did. Then, I shared the shortest history lesson I possibly could that explained the explorers, tradesmen, soldiers and settlers who migrated to the country at various times throughout its history and their influence and effect on the native Kenyan tribes. The flag is directly linked to the country's history - you can see the flag and learn more about it here.
Then we talked about symbols in our own culture - what shapes, colours and animals might mean to us in North America. The ages I was working with ranged from 4 to 10, so I picked pretty simple symbols - a heart, a dove, a dollar sign, a lion. We compared this to what shapes, colours and animals might represent to one of the tribes that call Kenya home...the Maasai. I found a wealth of information about the meaning of colours here. Finally, before moving on to our craft, we looked at some pictures of Maasai artifacts and people (Living Tribes has some amazing photographs of tribes from all over the world) and took note of the colours and shapes used in the items.
The children then dove into the craft of their choice...making a replica of a Maasai shield, mask or bead necklace. Each of these projects required the same materials...cardboard and paint, and the design was up to them. I made the pictures we looked at earlier available to the children to look at, and I shared copies of what the colours symbolized. The children were free, though, to use the colours, shapes and symbols that meant something significant to them. Instructions for the Maasai necklace were found in Super Simple African Art.
Another great day at homeschool co-op!
I'm not sure if I've mentioned how much I love, love, love our homeschool co-op. I've loved how the children have been engaged about the countries we've visited thus far. I've loved how the activity for the week has been played out by my kids once we've arrived back home, sometimes for days on end. I've loved the challenge of learning about different places and weaving together aspects of history, culture, geography, and craft into a tiny 45 minute block.
Today our group learned some more about Kenya. Last week, the children learned what the life of a typical Kenyan child might be like and finished their day by preparing and sharing a simple meal. This week, we looked into symbolism that weaves its way into both fine art and utilitarian artifacts - how the shapes and colours used by a culture have special significance and learning about that significance so we could appreciate the story an artifact tells.
I started our discussion by showing a picture of the Kenyan flag. We noticed the different colours and the shield and spear design in the middle. We wondered why the country picked the colours it did. Then, I shared the shortest history lesson I possibly could that explained the explorers, tradesmen, soldiers and settlers who migrated to the country at various times throughout its history and their influence and effect on the native Kenyan tribes. The flag is directly linked to the country's history - you can see the flag and learn more about it here.
Then we talked about symbols in our own culture - what shapes, colours and animals might mean to us in North America. The ages I was working with ranged from 4 to 10, so I picked pretty simple symbols - a heart, a dove, a dollar sign, a lion. We compared this to what shapes, colours and animals might represent to one of the tribes that call Kenya home...the Maasai. I found a wealth of information about the meaning of colours here. Finally, before moving on to our craft, we looked at some pictures of Maasai artifacts and people (Living Tribes has some amazing photographs of tribes from all over the world) and took note of the colours and shapes used in the items.
The children then dove into the craft of their choice...making a replica of a Maasai shield, mask or bead necklace. Each of these projects required the same materials...cardboard and paint, and the design was up to them. I made the pictures we looked at earlier available to the children to look at, and I shared copies of what the colours symbolized. The children were free, though, to use the colours, shapes and symbols that meant something significant to them. Instructions for the Maasai necklace were found in Super Simple African Art.
Another great day at homeschool co-op!
Thursday, 3 October 2013
Together again
Despite a rough start to the morning, we found ourselves at 10:00 with our bookwork for the day all done. I felt myself in a place we hadn't been to before, at least in recent memory - two hours left in the morning and nothing really planned.
Nicholas was already occupied on the computer, finding bird pictures for some scavenger hunt cards he was making for a friend. There's a great way to build spelling skills! But the girls were in need of some time with their Mama. And there was that Michaelmas celebration that I had wanted to play with...to see where we could take it, but didn't have time to do at the beginning of the week when I had originally planned it. Late is better than never, right?
We are not a religious family. I had never heard of Michaelmas before reading books about Waldorf education. There is no real significance to the celebration for us, and in that I struggle a bit. But new traditions, especially fun ones, need to start somewhere, and I'm game for building our own traditions. I used All Year Round to inspire the projects we did today.
As the girls were playing, I gathered up the ingredients for making a harvest loaf. As the yeast was proofing, I read them the story of Saint George and the Dragon. Then we made our way over to the kitchen and I read the story of Michael and the Dragon while adding ingredients and mixing them together. I'm looking forward to enjoying our harvest loaf as part of our afternoon snack!
1. Gather supplies and prepare the work area:
~ I used an old vinyl tablecloth to catch any spills or splatters, as hot wax can fly off a paintbrush as well as paint can.
~ We further protected our workspace from spills by using parchment paper muffin papers underneath our candles, and to pour any unused melted wax into. These worked great, as the wax, when cool, simply peeled right out of the paper and we could reuse it again in a matter of minutes.
~ We found a synthetic paintbrush that I didn't mind never using again for paint.
~ We used a small gravy ladle to melt the wax in, again, an item that I didn't mind if we ever used it again. Beeswax is one of those things that I really don't like cleaning up after!
~ A candle and matches, for melting the beeswax
~ Candles for painting on. I found some at a thrift store that were about 2 inches in diameter, and these were perfect.
~ Your beeswax. As I mentioned, we used leftover beeswax from candles. You could also use small or broken beeswax crayons too. I wouldn't recommend using a crayon made of a synthetic wax...I don't imagine it would smell too pretty.
2. Melt the beeswax:
~ This was my job. It's simply a matter of placing a small chunk of beeswax into the spoon and holding it over a lit candle.
~ Be careful not to get too close to the flame - beeswax will start to burn at a relatively low temperature. I gently swirled the beeswax in the spoon to help it melt faster.
~ Oh, and be aware that the bottom of your spoon will likely turn black.
~ Once the wax is melted, it can be removed from the flame and your little one can dip his or her brush right into the spoon. If it starts clumping, simply hold it back over the flame.
3. Let the painting begin!
~ Painting with beeswax was a lot like painting with paint...dip the brush and paint on the surface of the candle.
~ The wax will harden quickly, so use lots of short strokes, which was my children's preferred method. I dotted the wax onto my candle in an attempt to give my dragon a scaled look. It worked great for the red eye, claws, and neck plates.
~ Like painting on a vertical surface, the wax may drip down if too much is put in one spot. Unlike paint though, I imagine that the beeswax could be chipped off after it hardens if it ends up in the wrong place.
4. About changing colours:
~ I poured any leftover beeswax into a muffin paper, then peeled it out once it had cooled and hardened.
~ I was only prepared to part with one spoon, so our colour changes were not absolute or perfect...there was always a little of the last colour getting mixed into the new colour being added. This worked out well, though, because we only had a few colours to work with. Each person had the same but slightly different colours on their candles.
5. Cleanup:
~ It is so much easier to cleanup from painting with beeswax than with paint! Essentially, after the last candle was done, and the remaining wax was poured out and hardened (as in step 4 above), everything we used, from the muffin papers to the paintbrush to the spoon and the leftover wax, was put back into our stash of beeswax stuff. There was nothing to wash or scrub clean, because it was really about as clean as it was going to get.
By the time we got to the end of the day, which was full of singing, tickle kisses, and laughing just for the sake of laughing, I discovered the key for what this celebration will mean to me. I mused to myself that our harvest loaf was the first bread I'd made since the weather started getting warmer in the spring. I feel ourselves moving out of sweltering days and into days where the heat from the stove and oven is a welcome thing. Perhaps the dragon can symbolize our need for fire to warm our toes and noses as the days get chillier. Perhaps the bread can symbolize the change in the rhythm of the seasons. Perhaps the soft glow of the candles can represent moving into quieter, more reflective times.
Nicholas was already occupied on the computer, finding bird pictures for some scavenger hunt cards he was making for a friend. There's a great way to build spelling skills! But the girls were in need of some time with their Mama. And there was that Michaelmas celebration that I had wanted to play with...to see where we could take it, but didn't have time to do at the beginning of the week when I had originally planned it. Late is better than never, right?
We are not a religious family. I had never heard of Michaelmas before reading books about Waldorf education. There is no real significance to the celebration for us, and in that I struggle a bit. But new traditions, especially fun ones, need to start somewhere, and I'm game for building our own traditions. I used All Year Round to inspire the projects we did today.
As the girls were playing, I gathered up the ingredients for making a harvest loaf. As the yeast was proofing, I read them the story of Saint George and the Dragon. Then we made our way over to the kitchen and I read the story of Michael and the Dragon while adding ingredients and mixing them together. I'm looking forward to enjoying our harvest loaf as part of our afternoon snack!
After lunch, while Astrin rested, we decorated candles. The project gave us two options - we could use modelling beeswax and simply roll out shapes and press them by hand into the candles, or we could use melted wax and paint designs on the candles. We used leftover pieces of old beeswax candles as our paint. Here's how we did it:
1. Gather supplies and prepare the work area:
~ I used an old vinyl tablecloth to catch any spills or splatters, as hot wax can fly off a paintbrush as well as paint can.
~ We further protected our workspace from spills by using parchment paper muffin papers underneath our candles, and to pour any unused melted wax into. These worked great, as the wax, when cool, simply peeled right out of the paper and we could reuse it again in a matter of minutes.
~ We found a synthetic paintbrush that I didn't mind never using again for paint.
~ We used a small gravy ladle to melt the wax in, again, an item that I didn't mind if we ever used it again. Beeswax is one of those things that I really don't like cleaning up after!
~ A candle and matches, for melting the beeswax
~ Candles for painting on. I found some at a thrift store that were about 2 inches in diameter, and these were perfect.
~ Your beeswax. As I mentioned, we used leftover beeswax from candles. You could also use small or broken beeswax crayons too. I wouldn't recommend using a crayon made of a synthetic wax...I don't imagine it would smell too pretty.
2. Melt the beeswax:
~ This was my job. It's simply a matter of placing a small chunk of beeswax into the spoon and holding it over a lit candle.
~ Be careful not to get too close to the flame - beeswax will start to burn at a relatively low temperature. I gently swirled the beeswax in the spoon to help it melt faster.
~ Oh, and be aware that the bottom of your spoon will likely turn black.
~ Once the wax is melted, it can be removed from the flame and your little one can dip his or her brush right into the spoon. If it starts clumping, simply hold it back over the flame.
3. Let the painting begin!
~ Painting with beeswax was a lot like painting with paint...dip the brush and paint on the surface of the candle.
~ The wax will harden quickly, so use lots of short strokes, which was my children's preferred method. I dotted the wax onto my candle in an attempt to give my dragon a scaled look. It worked great for the red eye, claws, and neck plates.
~ Like painting on a vertical surface, the wax may drip down if too much is put in one spot. Unlike paint though, I imagine that the beeswax could be chipped off after it hardens if it ends up in the wrong place.
4. About changing colours:
~ I poured any leftover beeswax into a muffin paper, then peeled it out once it had cooled and hardened.
~ I was only prepared to part with one spoon, so our colour changes were not absolute or perfect...there was always a little of the last colour getting mixed into the new colour being added. This worked out well, though, because we only had a few colours to work with. Each person had the same but slightly different colours on their candles.
5. Cleanup:
~ It is so much easier to cleanup from painting with beeswax than with paint! Essentially, after the last candle was done, and the remaining wax was poured out and hardened (as in step 4 above), everything we used, from the muffin papers to the paintbrush to the spoon and the leftover wax, was put back into our stash of beeswax stuff. There was nothing to wash or scrub clean, because it was really about as clean as it was going to get.
By the time we got to the end of the day, which was full of singing, tickle kisses, and laughing just for the sake of laughing, I discovered the key for what this celebration will mean to me. I mused to myself that our harvest loaf was the first bread I'd made since the weather started getting warmer in the spring. I feel ourselves moving out of sweltering days and into days where the heat from the stove and oven is a welcome thing. Perhaps the dragon can symbolize our need for fire to warm our toes and noses as the days get chillier. Perhaps the bread can symbolize the change in the rhythm of the seasons. Perhaps the soft glow of the candles can represent moving into quieter, more reflective times.
Tuesday, 3 September 2013
Welcome banner
As we enter our second homeschooling year, I wanted to create a simple yet meaningful visual to mark our transition back into our homeschooling routine. Something we could all be a part of and see ourselves in. Something unique. Something natural. I arrived at the idea of a banner with pieces created by each of us to represent what we would like the coming year to be.
The idea was grounded in a sweep of paper stars we used to have hanging in the hall that leads from our mudroom into the rest of the house. In India, people would hang a sweep of stars in their doorway to keep bad vibes out of the house, including the bad vibes either they or guests may be carrying as baggage. To this we married needle felting...handwork that my children have adored in the past, and have been away from for awhile. Each piece is as unique as its creator...a boat representing wanting to be in water...a bone representing wanting to work with animals...a hammer representing building things...a Christmas tree for sharing...a heart for sharing love and being a house full of love...a person that represents our entire family...a snowman representing winter fun.
May peace, love and light fill your home.
The idea was grounded in a sweep of paper stars we used to have hanging in the hall that leads from our mudroom into the rest of the house. In India, people would hang a sweep of stars in their doorway to keep bad vibes out of the house, including the bad vibes either they or guests may be carrying as baggage. To this we married needle felting...handwork that my children have adored in the past, and have been away from for awhile. Each piece is as unique as its creator...a boat representing wanting to be in water...a bone representing wanting to work with animals...a hammer representing building things...a Christmas tree for sharing...a heart for sharing love and being a house full of love...a person that represents our entire family...a snowman representing winter fun.
May peace, love and light fill your home.
Tuesday, 27 August 2013
The brighter side
Okay, I'm through the tired groaning of my last post. While still busy, I've been able to shed the negative feelings that came along with all that tiredness and can now see the brighter side of the homemaking I do. How can one not see the goodness being passed on to my little ones when shown their smiling, happy faces?
I have recalibrated things a bit too. A trip to the playground after picking veggies. A hike and some quiet art time. Reading bedtime stories.
I'm not going to bed earlier yet, but that will come soon. The Earth is preparing for its rest after an abundant gardening season. I can see and feel the subtle changes. Despite the scorching days, the evenings are cool. The trees are starting to change from a vibrant green to a mellow yellow. They are starting to lose their leaves. All too soon we will be enjoying the abundance we put up.
One of the most rewarding (and perhaps unexpected) things my eyes have been opened to is that the children have ample time for their own projects while I work in the garden and kitchen. They have no worries of me whisking them off to the science centre, museum or library and they have all the space they need to get their hands and minds following their interests. I am still available to them when they need guidance or advice. And they are growing their talents and finding different avenues to practice new and old skills alike. They are learning how to learn on their own. They are creating. They are in a safe place. There is plenty of time and space for them to just be who they are in the present moment. In recalibrating, I have increased my awareness of what is going on around me, and it is amazing.
I have recalibrated things a bit too. A trip to the playground after picking veggies. A hike and some quiet art time. Reading bedtime stories.
I'm not going to bed earlier yet, but that will come soon. The Earth is preparing for its rest after an abundant gardening season. I can see and feel the subtle changes. Despite the scorching days, the evenings are cool. The trees are starting to change from a vibrant green to a mellow yellow. They are starting to lose their leaves. All too soon we will be enjoying the abundance we put up.
One of the most rewarding (and perhaps unexpected) things my eyes have been opened to is that the children have ample time for their own projects while I work in the garden and kitchen. They have no worries of me whisking them off to the science centre, museum or library and they have all the space they need to get their hands and minds following their interests. I am still available to them when they need guidance or advice. And they are growing their talents and finding different avenues to practice new and old skills alike. They are learning how to learn on their own. They are creating. They are in a safe place. There is plenty of time and space for them to just be who they are in the present moment. In recalibrating, I have increased my awareness of what is going on around me, and it is amazing.
Sunday, 21 July 2013
Fever
Our weekend and the week ahead were planned out months ago. We were to go to a wedding on Saturday and then head out to a nearby lake and provincial park in the week that followed. I've been planning and cooking meals to feed 12, with my husband's family joining us at the lake. I was daydreaming about dressing up and dancing with my loves while packing fishing rods and crafting things, raincoats and swimsuits.
Things sometimes don't turn our exactly as we planned, though. My son became sick and is still laying on the couch with a fever and no appetite. So instead of wedding festivities, I got dressed up anyway, did some crafting and dined on takeout with a girlfriend who came over to keep me company. Instead of heading out to the lake with the rest of the family today, Nicholas and I are hanging out at home, listening to the football game. There's a pot of chicken broth on the stove, when he's up for taking a sip or two. I'm enjoying a simple meal of the little odds and ends that happen to have been left behind after the others left. Hopefully we will head out tomorrow on the bus. If not, we'll keep on waiting this fever out until it breaks.
It's been amazingly quiet around here. And in the midst of the quiet has come the space to experiment in new territory...
...playing with shibori as I prepare a birthday present (instructions from the Living Crafts summer 2012 issue, silk scarf from Thai Silks)
...trying out quilting as I make a floor mat for our kitchen or bathroom (the Little River Rug pattern from Reinvention, material from our old holey jeans)
...reading up on beekeeping, as we've discovered beekeeping is legal in our city (cozying up to Beekeeping: A Practical Guide and Urban Beekeeping while sipping on iced tea on the porch tonight).
I'm hopeful for a healthy week ahead of us.
Things sometimes don't turn our exactly as we planned, though. My son became sick and is still laying on the couch with a fever and no appetite. So instead of wedding festivities, I got dressed up anyway, did some crafting and dined on takeout with a girlfriend who came over to keep me company. Instead of heading out to the lake with the rest of the family today, Nicholas and I are hanging out at home, listening to the football game. There's a pot of chicken broth on the stove, when he's up for taking a sip or two. I'm enjoying a simple meal of the little odds and ends that happen to have been left behind after the others left. Hopefully we will head out tomorrow on the bus. If not, we'll keep on waiting this fever out until it breaks.
It's been amazingly quiet around here. And in the midst of the quiet has come the space to experiment in new territory...
...playing with shibori as I prepare a birthday present (instructions from the Living Crafts summer 2012 issue, silk scarf from Thai Silks)
...trying out quilting as I make a floor mat for our kitchen or bathroom (the Little River Rug pattern from Reinvention, material from our old holey jeans)
...reading up on beekeeping, as we've discovered beekeeping is legal in our city (cozying up to Beekeeping: A Practical Guide and Urban Beekeeping while sipping on iced tea on the porch tonight).
I'm hopeful for a healthy week ahead of us.
Subscribe to:
Posts (Atom)